
Getting Started with AWS Copilot
In this tutorial, we’ll cover the steps of getting started with a new Amazon service - AWS Copilot. We’ll be using the Cloud9 service to get a container up and running upon which we’ll deploy the Copilot application.
Step 1 - Navigate to the Cloud9 Console & Start Service
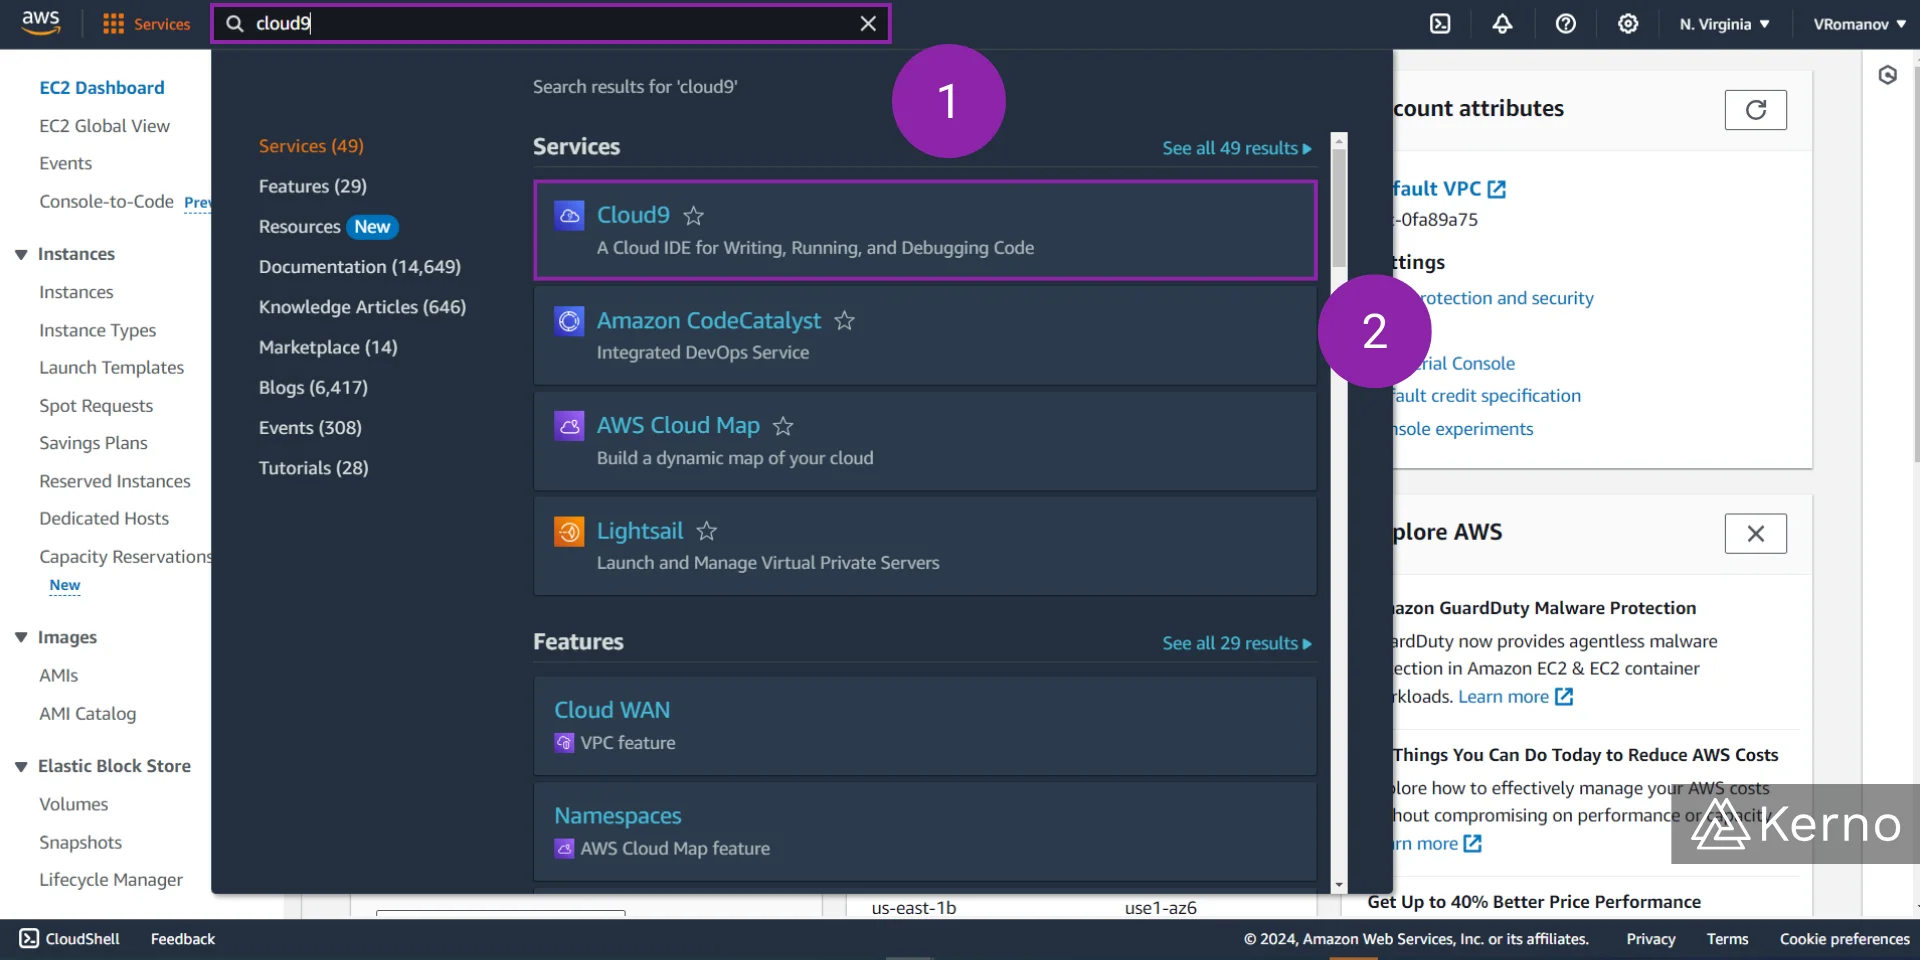
1.1 - From the AWS Console, search for “Cloud9.”
1.2 - From the drop-down menu, click on “Cloud9.”
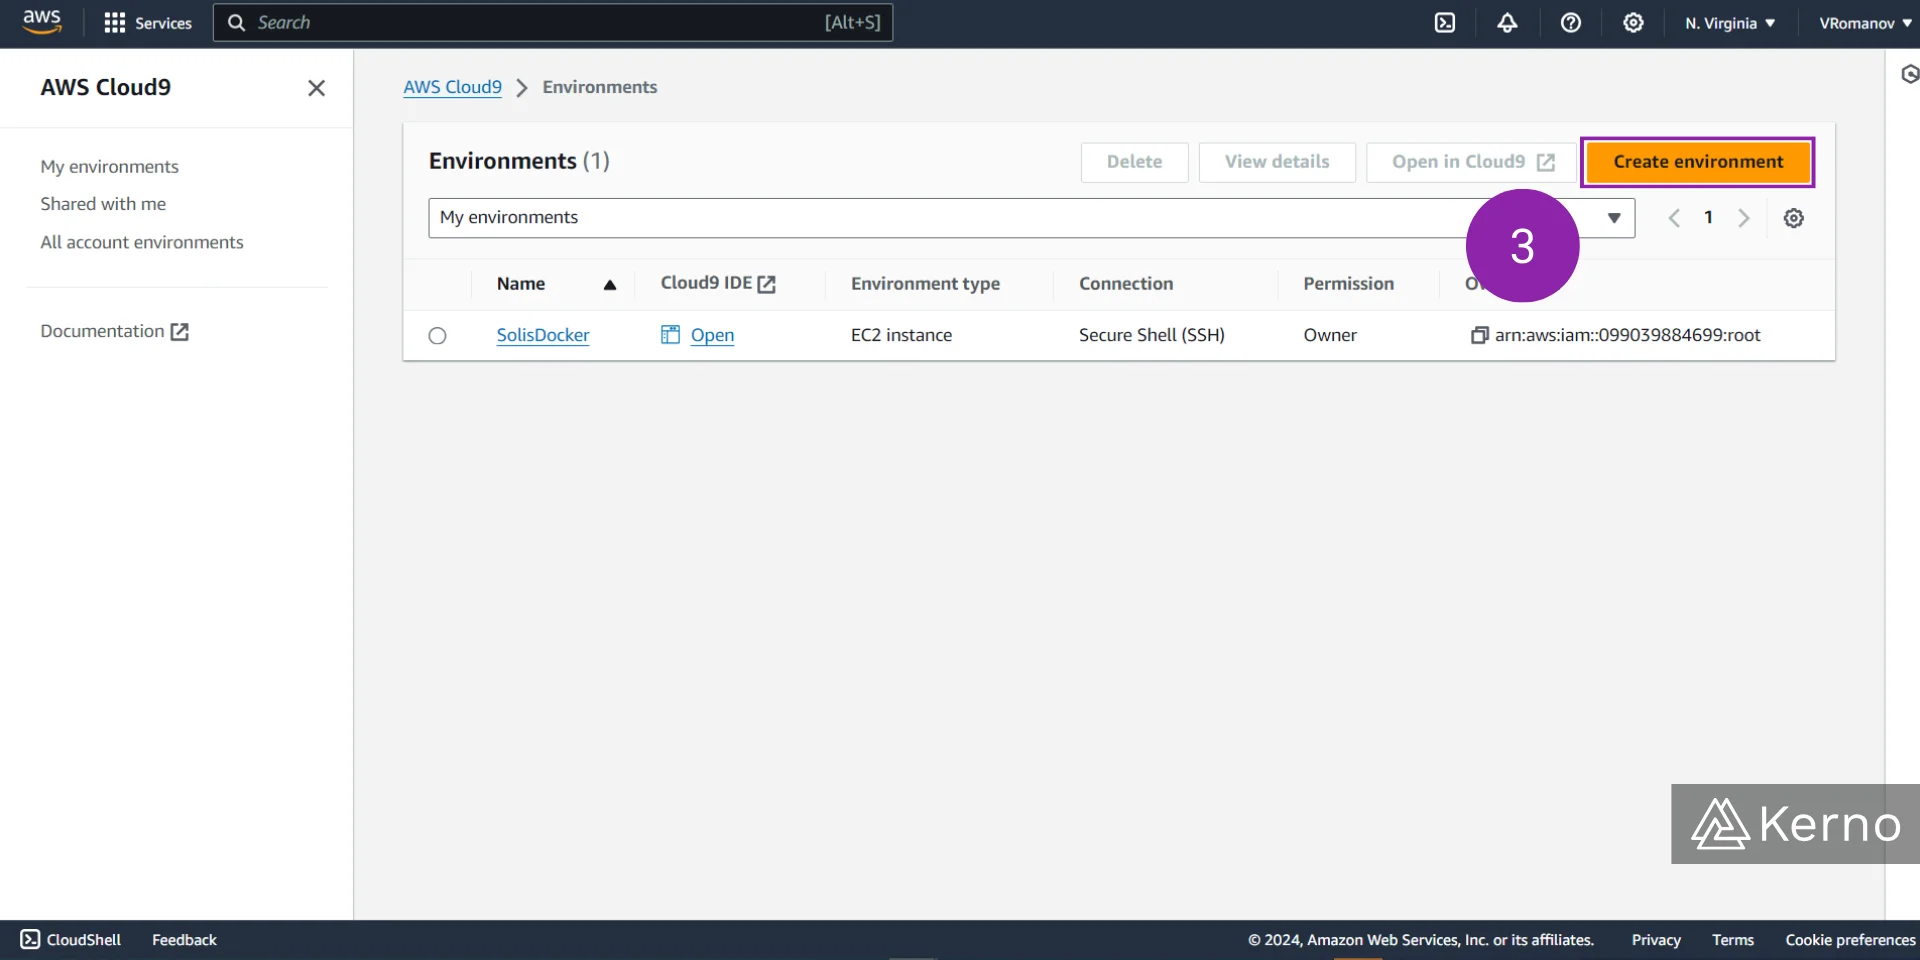
1.3 - Click on the “Create environment” button in the top right corner of the page.
1.4 - In the “Name” field, enter a unique name for your instance.
1.5 - We will be creating a new EC2 instance for this purpose; you can choose to use an existing one.
1.6 - For testing purposes, the smallest instance (t2.micro) is more than sufficient. If you need more power, you can choose one of the other options presented under the “New EC2 instance” section.
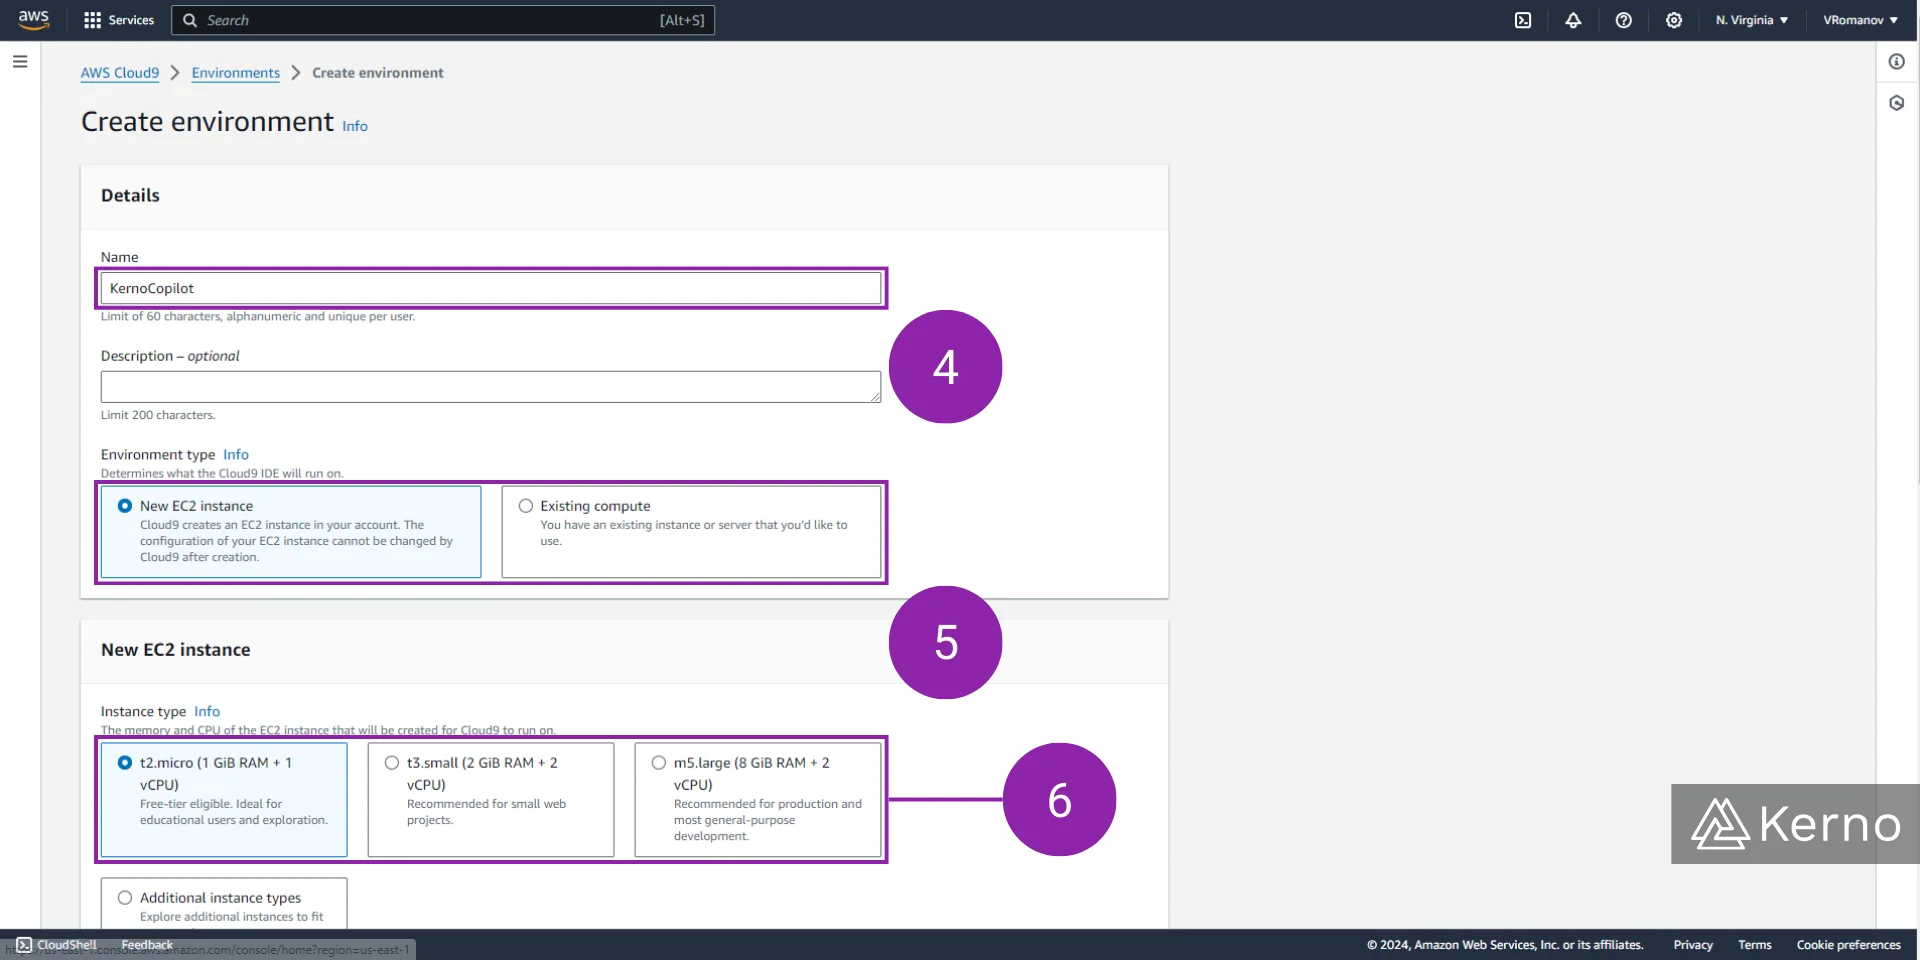
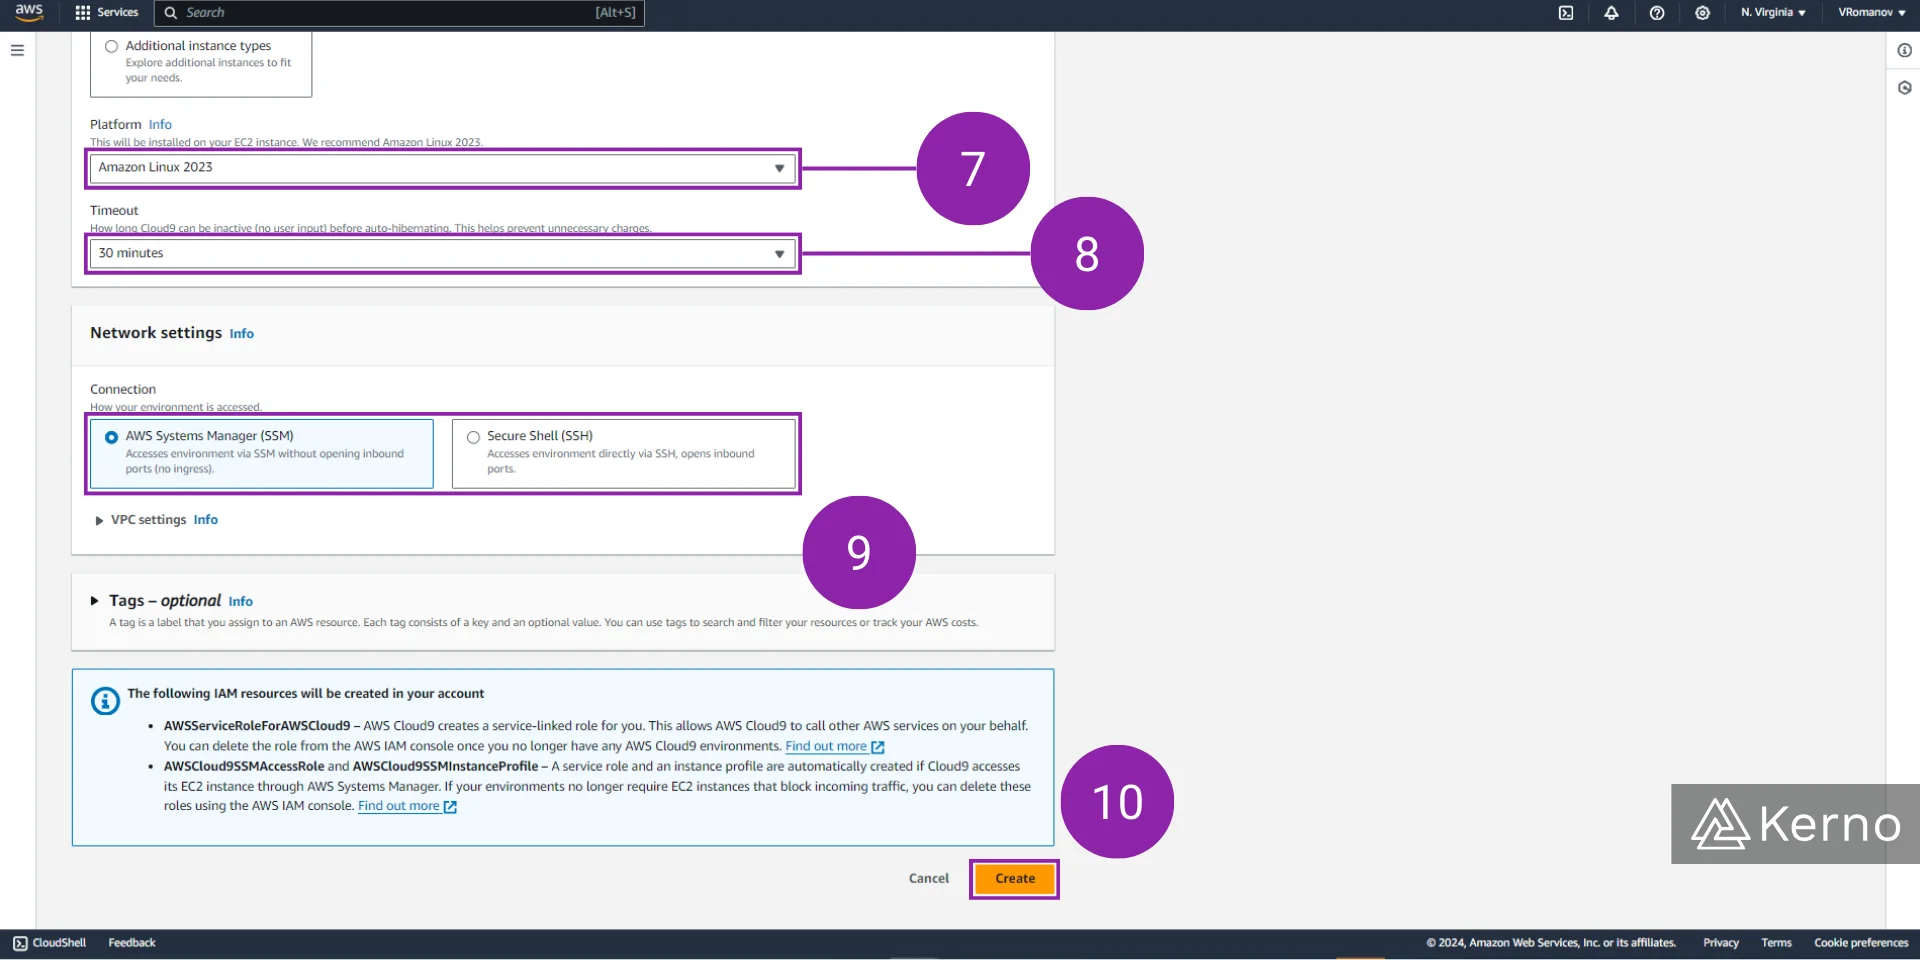
1.7 - You can select an operating system under the “Platform” section. In this example, we’re going to use “Amazon Linux 2023.”
1.8 - Set a timeout for your instance; we’re going to use the default of “30 minutes.”
1.9 - You can connect to an EC2 instance in various ways; in this tutorial, we’re going to use the AWS Systems Manager (SSM).
1.10 - At the bottom of the page, click on “Create.”
At this point, you should receive a confirmation message that indicates that your instance is being created. This will take a few minutes. However, you should see the environment listed on the main page.
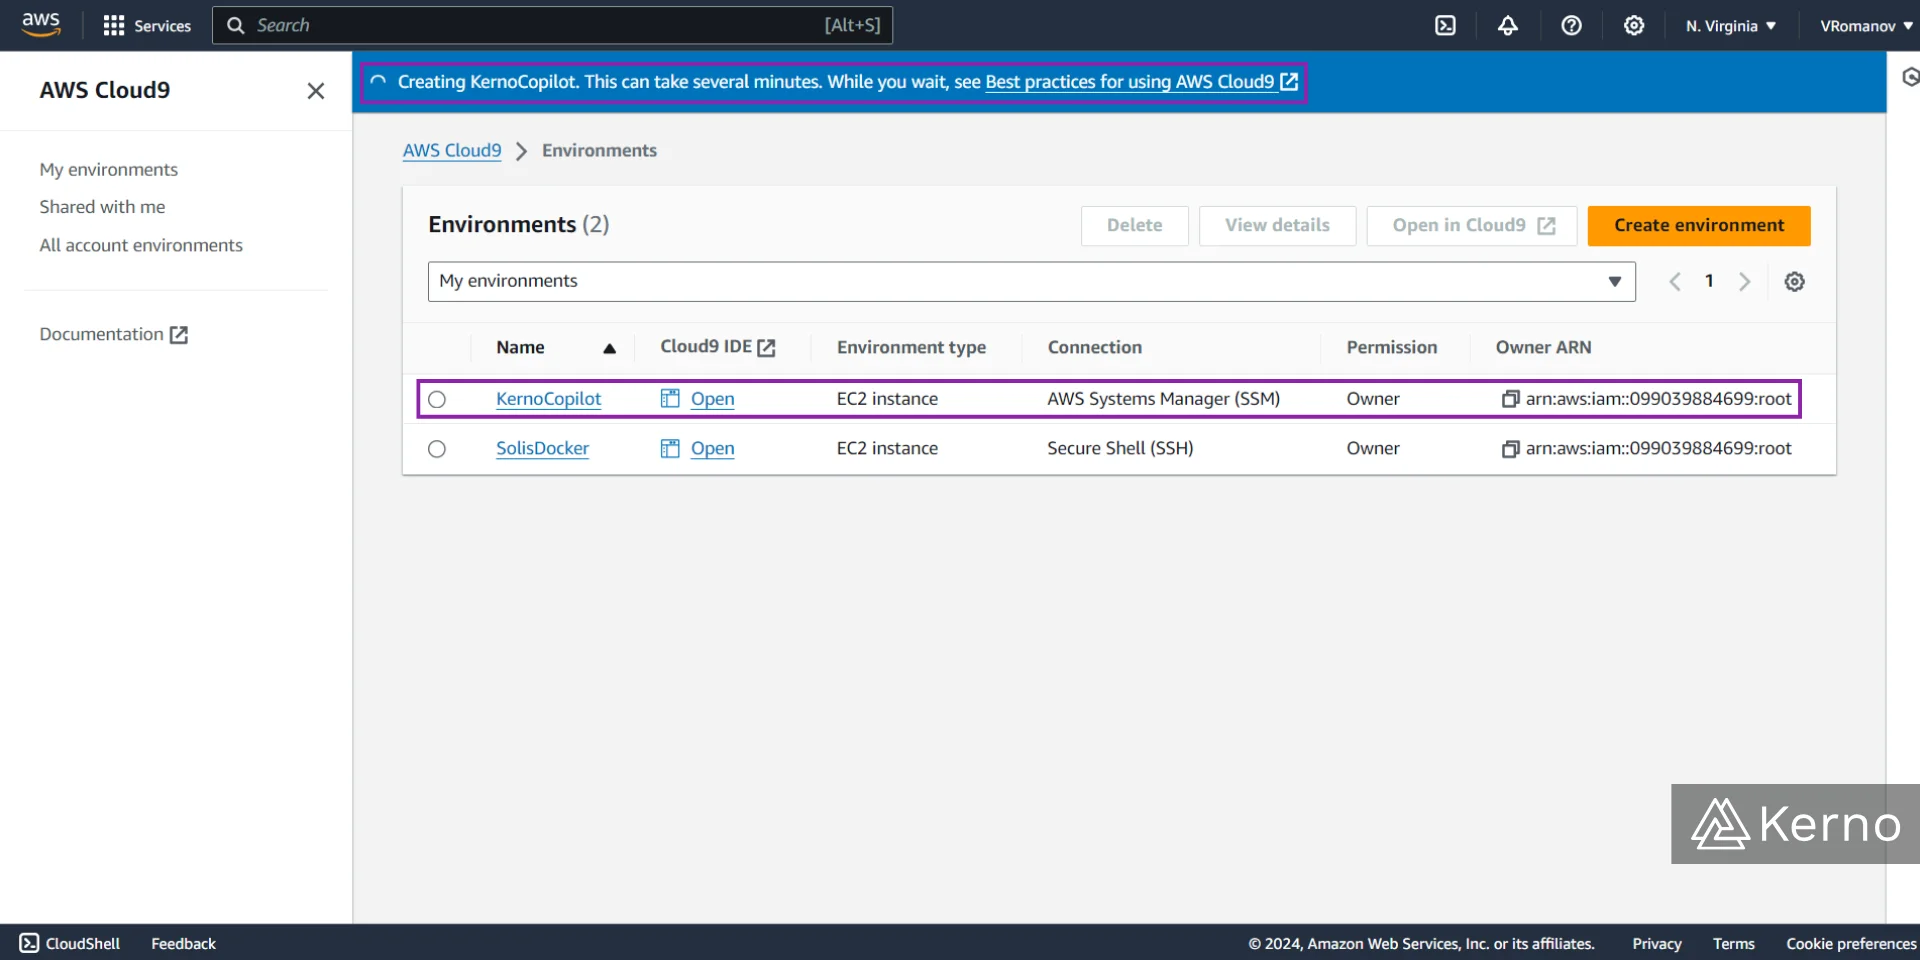
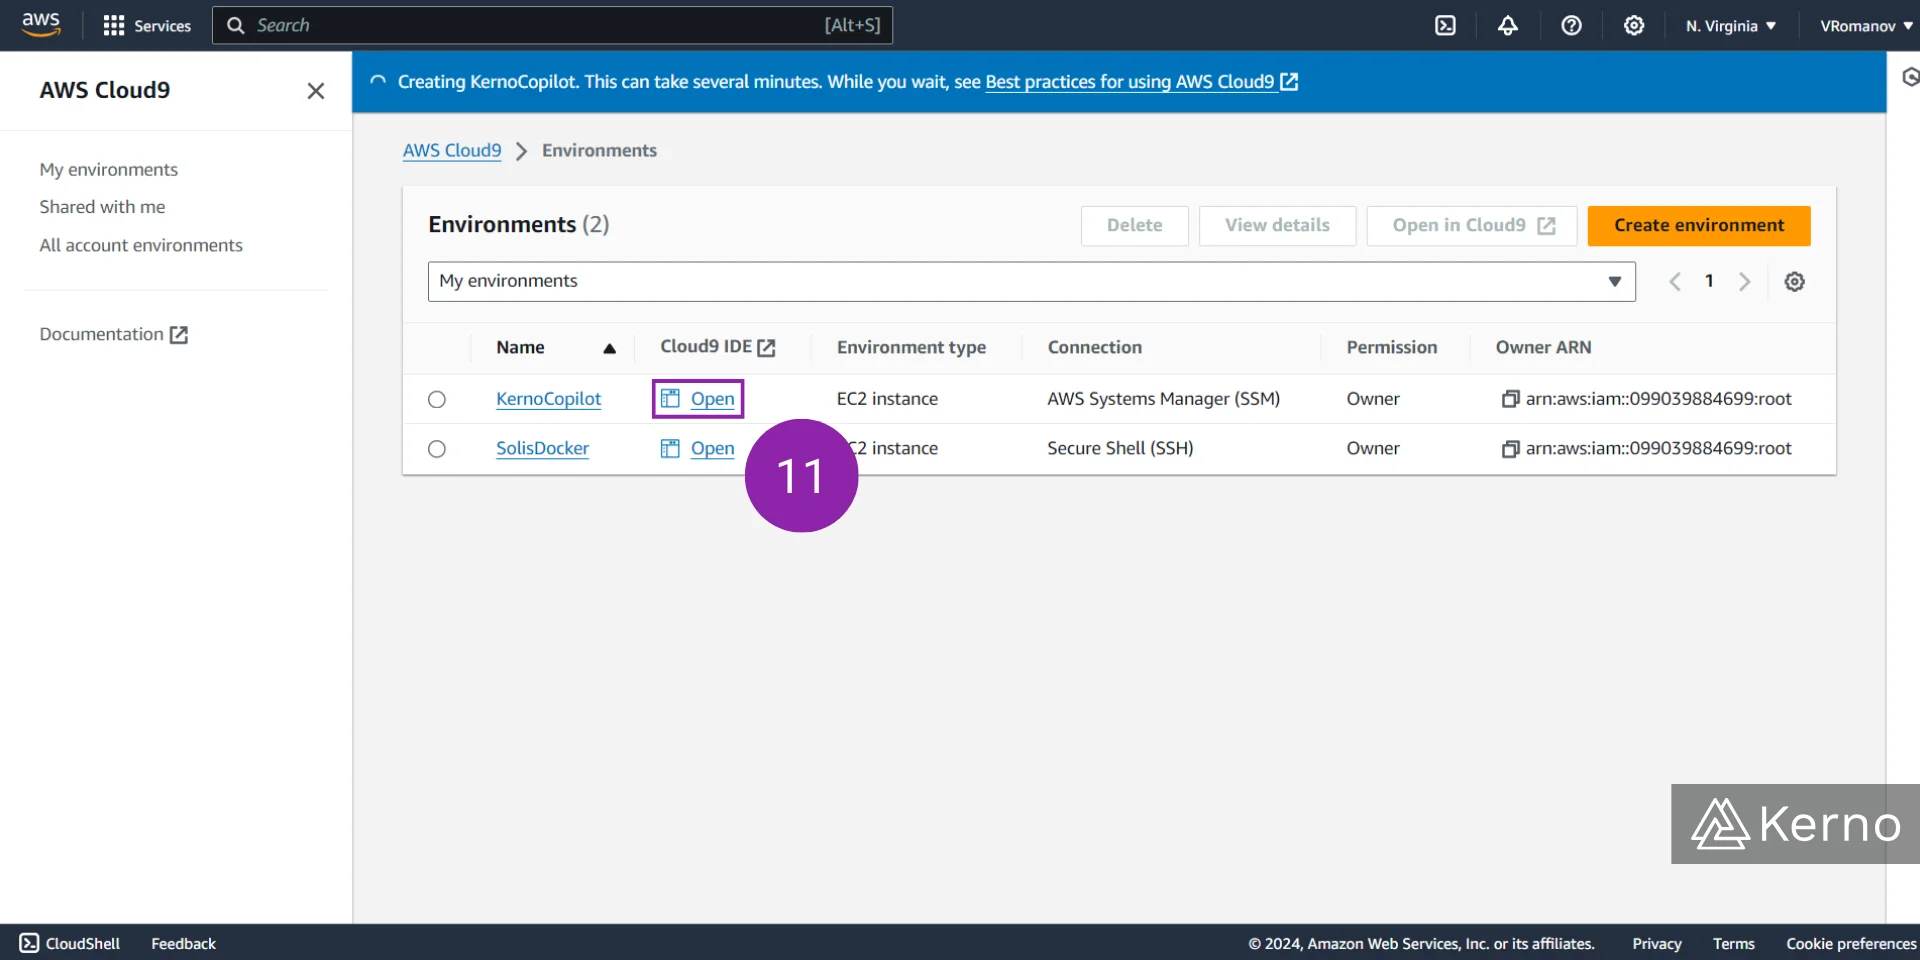
1.11 - From the AWS Cloud9 Console, select the environment that you’ll be using in the following steps by pressing on Open for the appropriate instance. Your browser should open a separate page with the Cloud9 environment access.
Step 2 - Installing Copilot on Linux
We’ve chosen the Cloud9 service to deploy our Copilot instance; note that you can follow the steps outlined below within any Linux or even MacOS environment.
2.1 - [OPTIONAL] To verify that Copilot is not installed on the machine, you can issue the following command:
You should see a “command not found” response if it’s not installed and a set of instructions if it’s already installed.
We'll issue the following command to retrieve some of the files we need for the installation of the copilot:
Let's navigate into the directory we've just downloaded:
Notice that we’re essentially cloning a project that contains several files from GitHub. The two files we want to pay attention to are the Dockerfile and “index.html.”
2.2 - Notice the list of files we’ve imported with the previous command.
2.3 - Notice that you can open each one of the files and view the contents. The Dockerfile contains the specifications for nginx (a networking service) that exposes port 80 while the “index.html” file contains a basic web page that will be used as an interface.

Step 3 - Initializing AWS Copilot
At this point, we’ve installed Copilot on the instance and are ready to get started with the initialization process. Use the following command whenever you’re ready to begin:
At this point, you’ll be asked a series of questions that pertain to the setup of the copilot. Below, you’ll find what we’ve used to get it up and running for this tutorial:
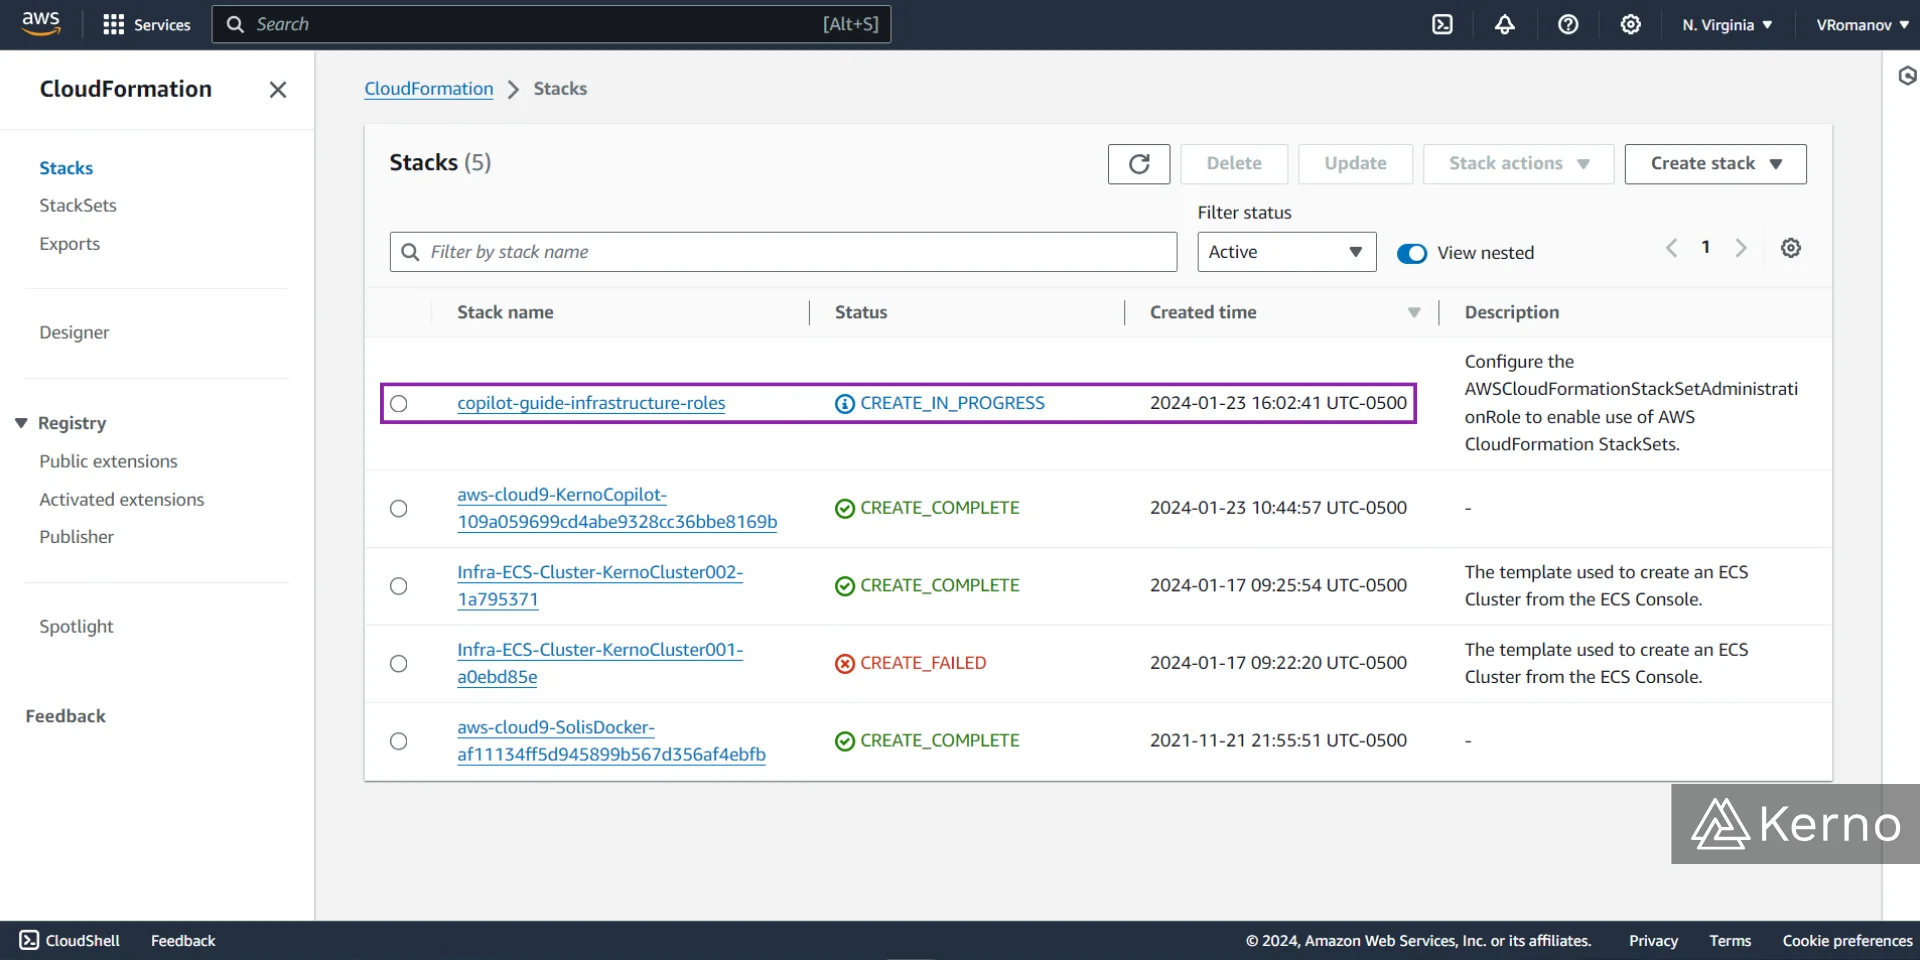
If you navigate to the CloudFormation console within AWS, you'll notice that our command has begun to spin up infrastructure required for our application.
You may also notice that a YAML file was created as a result of issuing the previous command. This file specifies certain parameters for the applications we're going to deploy. You can view the contents of the file by double clicking on it in the sidebar.

Let's issue the following command to start the deployment process:
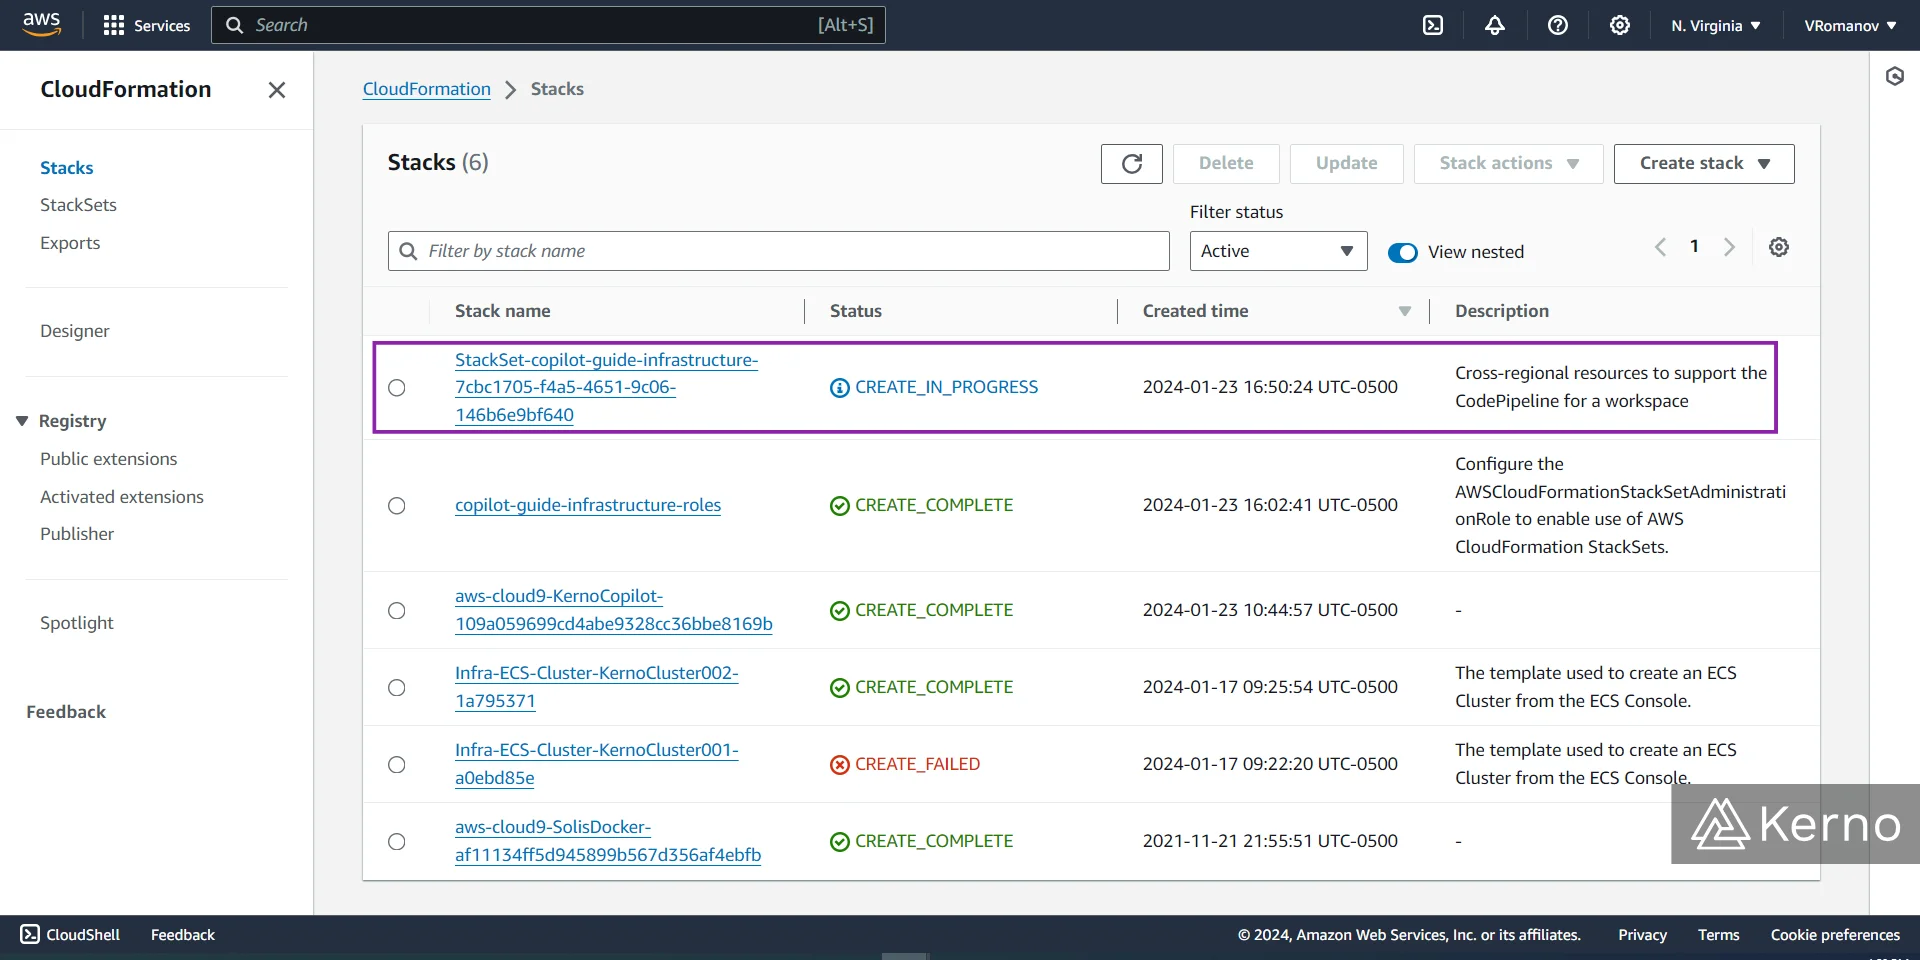
If you once again navigate to CloudFormation, you'll notice that we've begun the deployment of additional services as shown below:
We're now ready to deploy copilot!
When you issue the command above, you're likely to run into an error. This error is due to the fact that we haven't set the correct permissions between AWS and Cloud9.
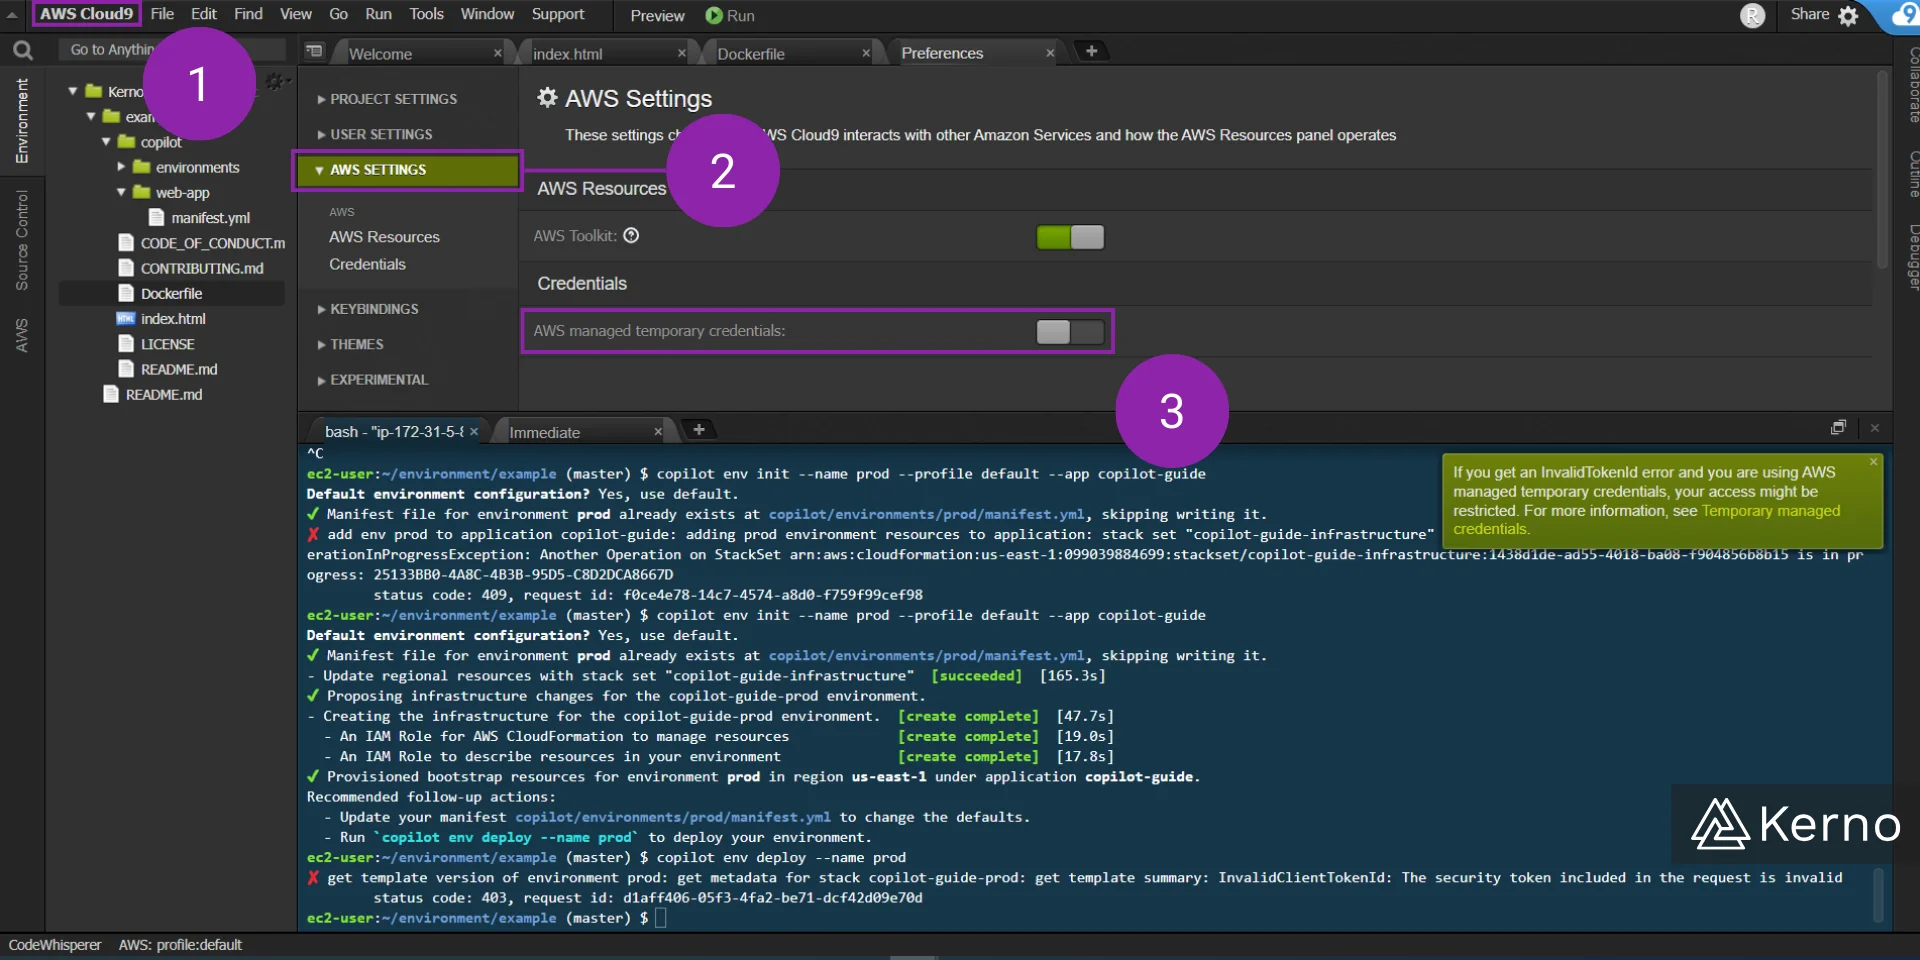
Fixing Permissions in AWS and Cloud9
We'll need to do a few things... First, there's a setting in Cloud9 that we need to update. It's located within the AWS Cloud9 settings; toggle it off as shown below.
3.1 - Open the AWS Cloud9 Dropdown menu and select "Preferences."
3.2 - Navigate to the "AWS SETTINGS" menu.
3.3 - Toggle OFF the "AWS managed temporary credentials."
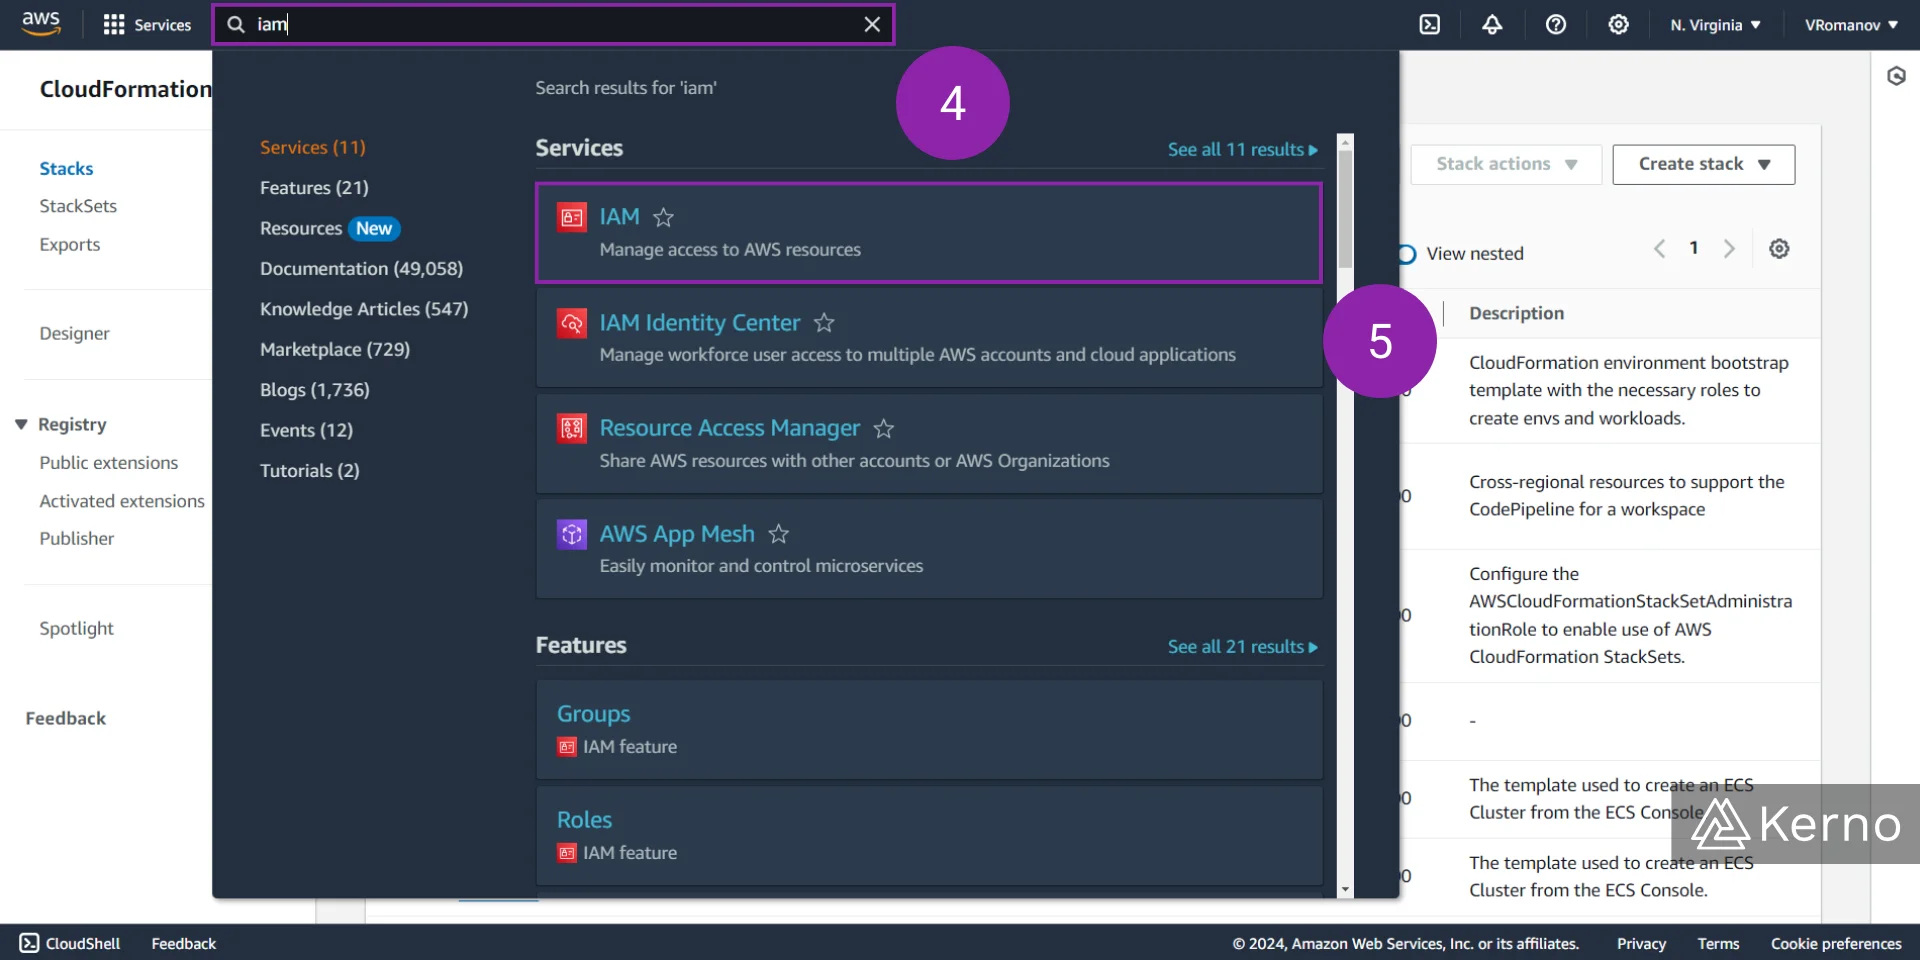
Next, we'll need to create a user with the correct permissions to deploy the services we require. To do so, we're going to use the AWS IAM service.
3.4 - On AWS, search for "iam."
3.5 - Select the IAM Console to navigate to the main page.
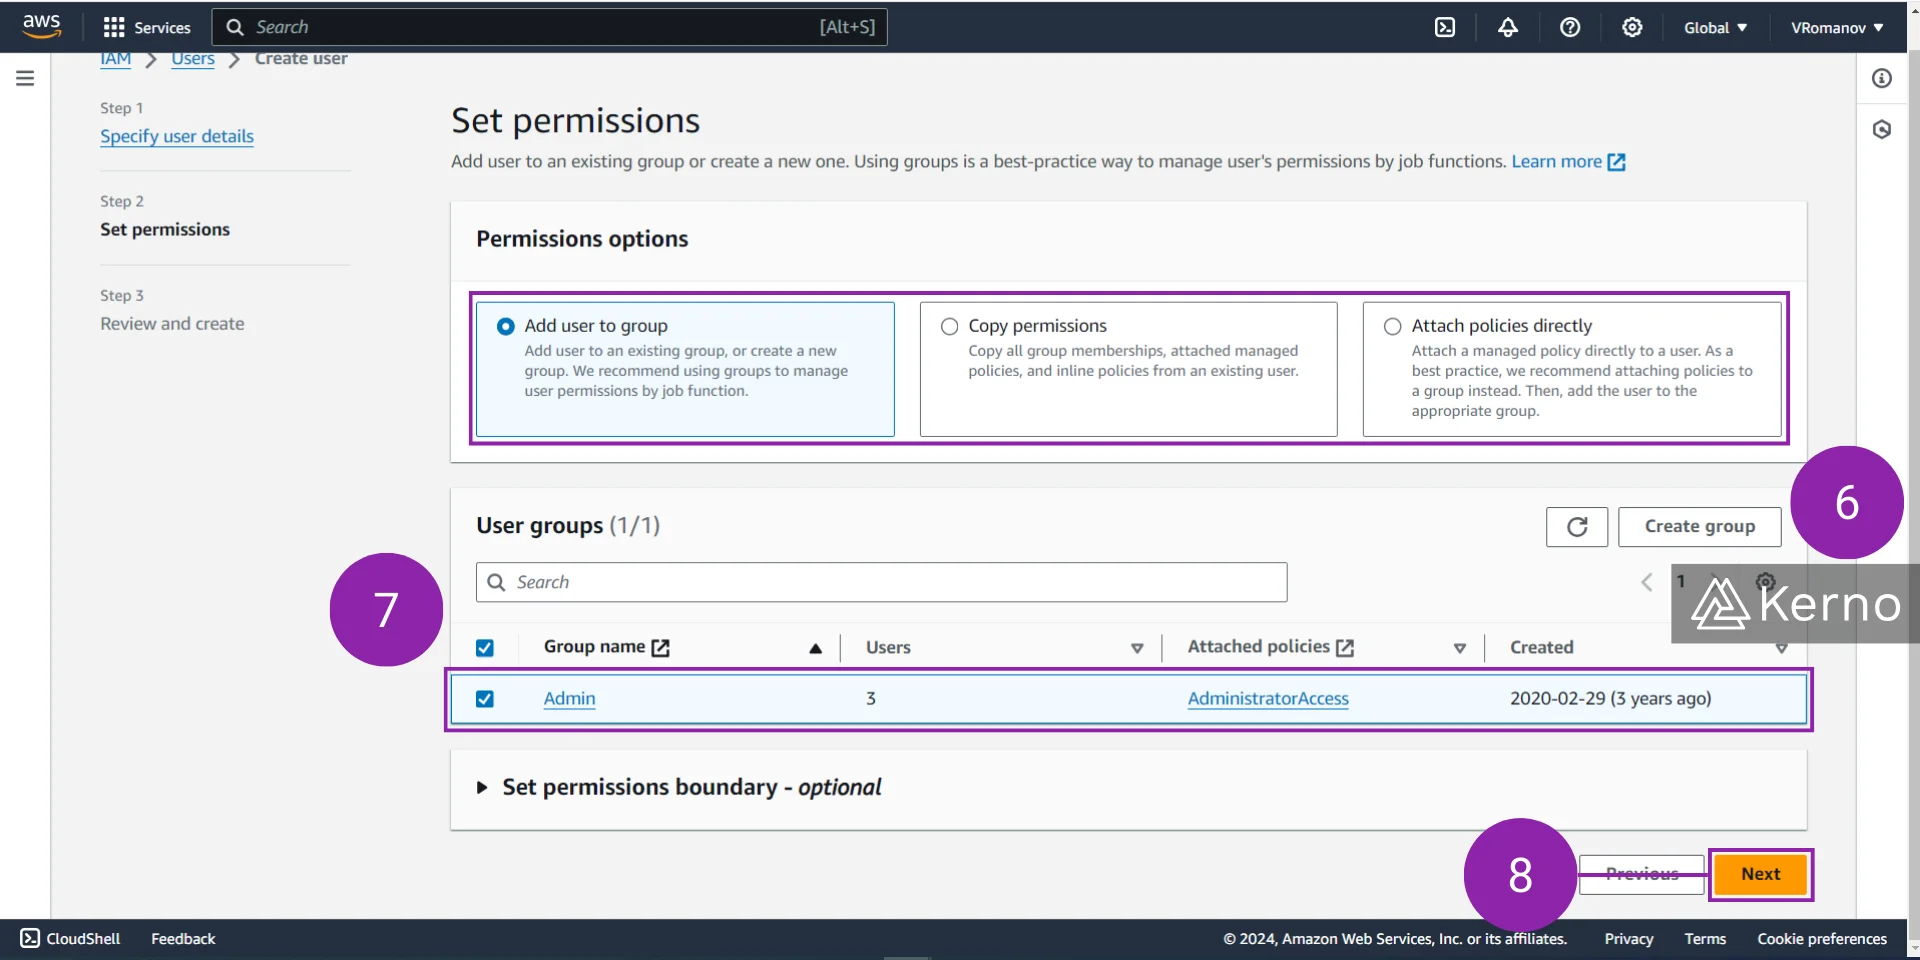
3.6 - In one of the previous tutorials, we've created an IAM User Group for our Admin users. If you haven't done so, you can navigate to the main page of AWS IAM and create a new group. Once that is done, choose to add the new user to that "Admin" group.
3.7 - Select the group to add the user to. In this case, the Admin group has admin privilege's.
3.8 - Press on "Next."
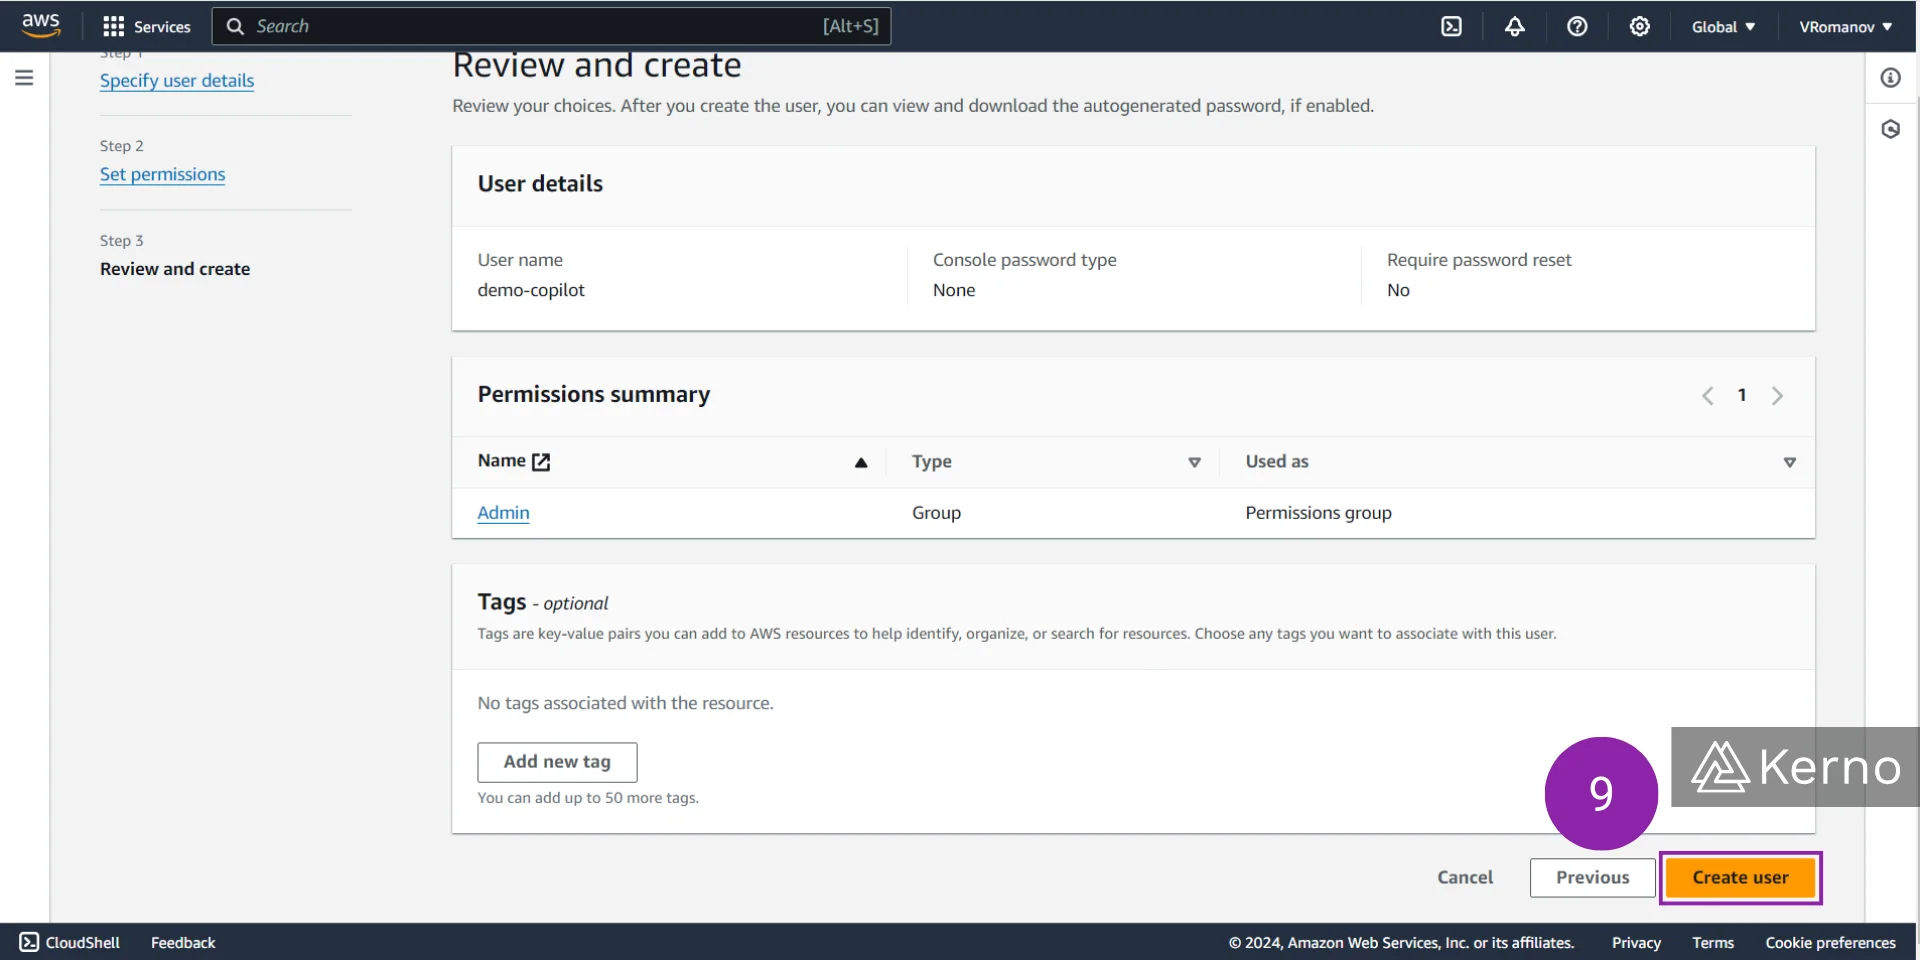
3.9 - Verify the settings and press on "Create user."
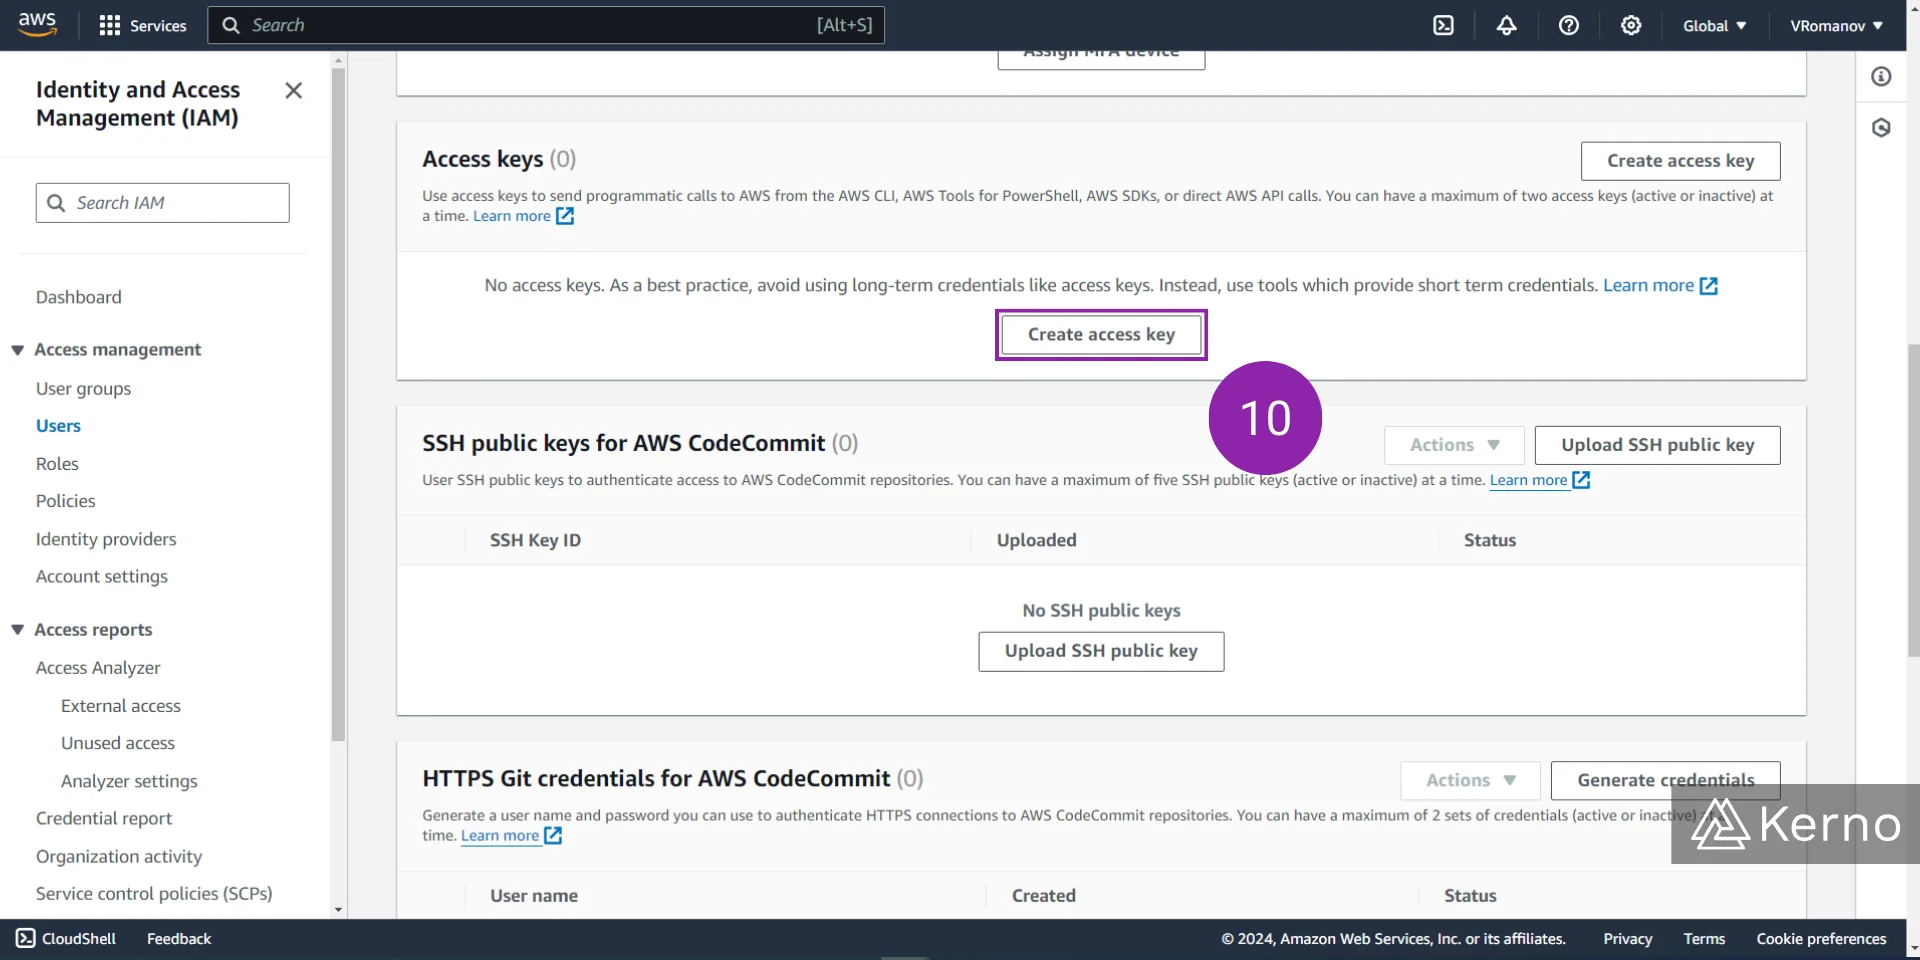
The next step is to create access key for the user we just created. Navigate to the
3.10 - Press on the "Create access key" button to start the process.
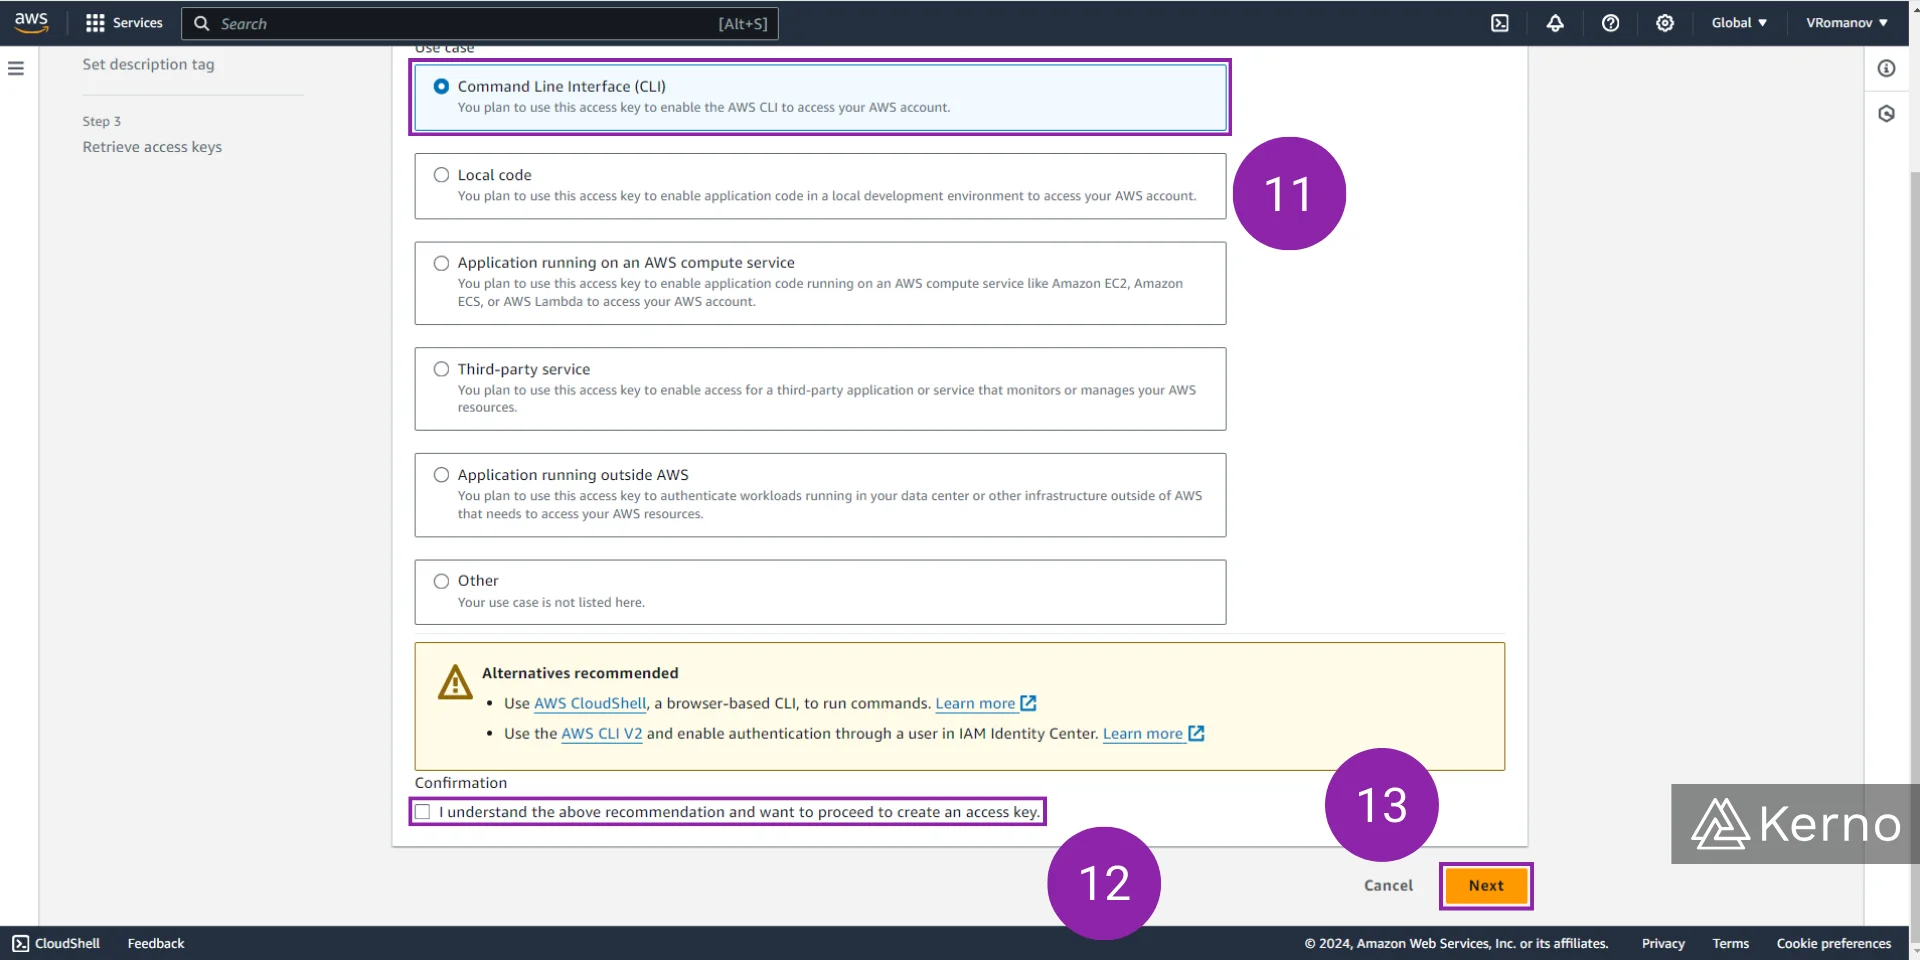
3.11 - We will be using the access keys for the CLI commands we will issue over Cloud9. Select the CLI option.
3.12 - Confirm that you've accepted the recommendations.
3.13 - Press on "Next."
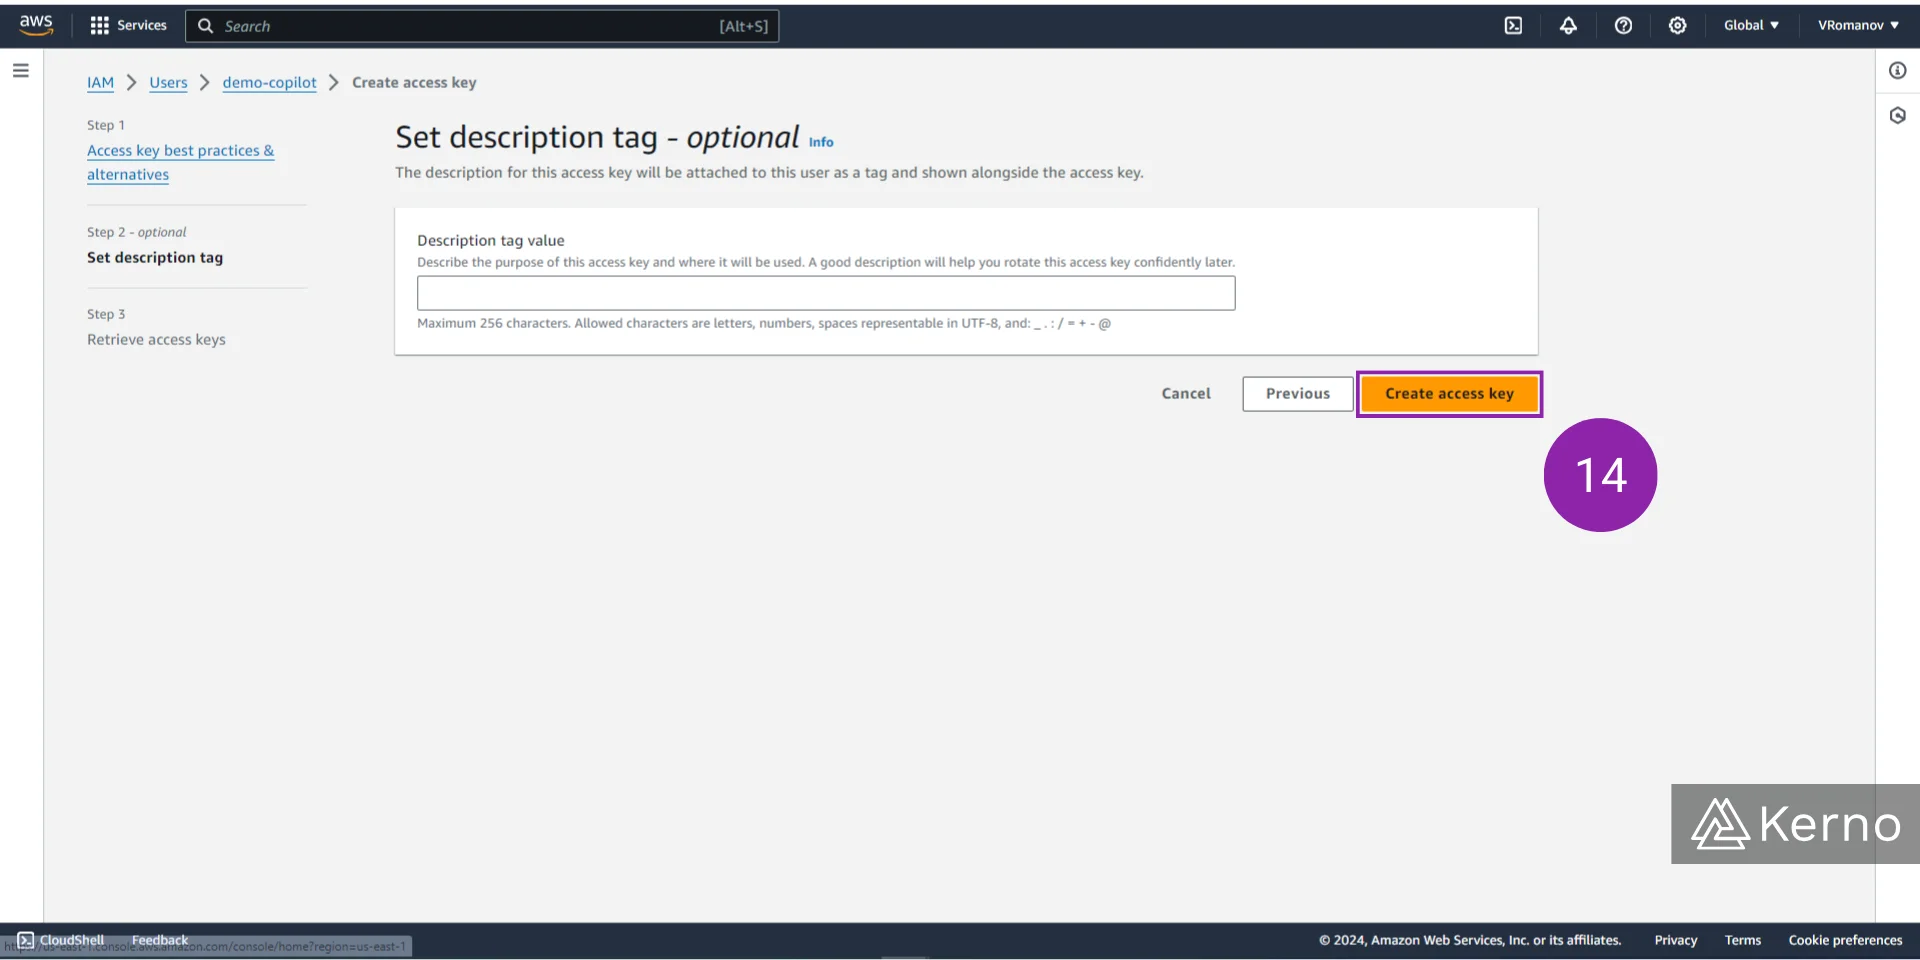
3.14 - Press on "Create access key."
At this point, we have a key that we can use within the Cloud9 CLI and proceed with the Copilot installation / deployment.
Within the same CLI as we've been working with previously, type in the following command:
You'll be prompted to enter the key and the secret passphrase we've created in the previous step. You'll also be prompted to enter the region in which your service is being deployed. You can get this by going to CloudFormation and looking in the top right bar - CloudFront is a regional service and should thus display the region it was deployed in.
We can now re-issue the following command that should execute without any issues:
At this point, AWS Copilot is deployed and accessible via the EC2 instance that has been created. You can view the page if you choose to; the placeholder will contain nothing but the logo for the Copilot.
Step 4 - Removing Copilot
We've gone through the demo installation of AWS Copilot. At this stage, it's important to clear out all the services that have been deployed so that we don't incur the costs.
Run the following command:
Navigate to CloudFormation and delete the services that have been created there as a result of the commands we ran.
Delete the user and the associated access key. Note that you can choose to use this user for other purposes; there's no cost associated with an additional user on AWS.
Conclusion on AWS Copilot
AWS Copilot is a powerful tool to easily build, release, and deploy production ready applications on top of AWS ECS, and AWS Fargate. We've walked through the process of creating a virtual environment using AWS Cloud9 followed by deploying an application that demonstrates the basic premise of AWS Copilot by deploying all the associate infrastructure required to run, manage the traffic for, manage the storage for, and all associated ressources.