
In this tutorial, our goal is to provide you with the means of installing Kubernetes on your local machine regardless of the underlying operating system. Kubernetes is quickly becoming the most popular orchestration engine used to deploy applications, microservices, APIs, and much more. It’s becoming important for engineers, developers, architects, DevOps, platform engineers, and many other roles to be familiar with Kubernetes, and it all starts with the installation.
Although it should be understood that a corporate deployment isn’t going to be replicable on a local environment and you’re not going to see all the benefits of a distributed architecture, it’s possible to learn nearly every aspect of Kubernetes via a local deployment. If there’s a need to learn further, you should be looking at services that allow you to deploy and simulate environments in the cloud - AWS, GCP, Azure, and others.
Here, we aim to cover the following:
- Installing and Running Kubernetes via Docker Desktop
- Installing and Running Kubernetes via minikube
- Installing and Running Kubernetes via MicroK8s
Installing Kubernetes via Docker Desktop
Docker is a widely accepted virtualization software. Kubernetes will orchestrate how Docker-based containers are deployed and run within an environment. One of the simplest ways to install Kubernetes is through a tool called “Docker Desktop.” It’s important to note that Docker Desktop isn’t an open-source software. During the installation process, you agree that you’ll need to purchase a license if you work or are part of an organization that has more than 250 employees OR has more than $10 million USD in annual revenue. If you don’t meet either one of those requirements, Docker Desktop is completely free.
Step 1 - Download Docker Desktop for your Operating System
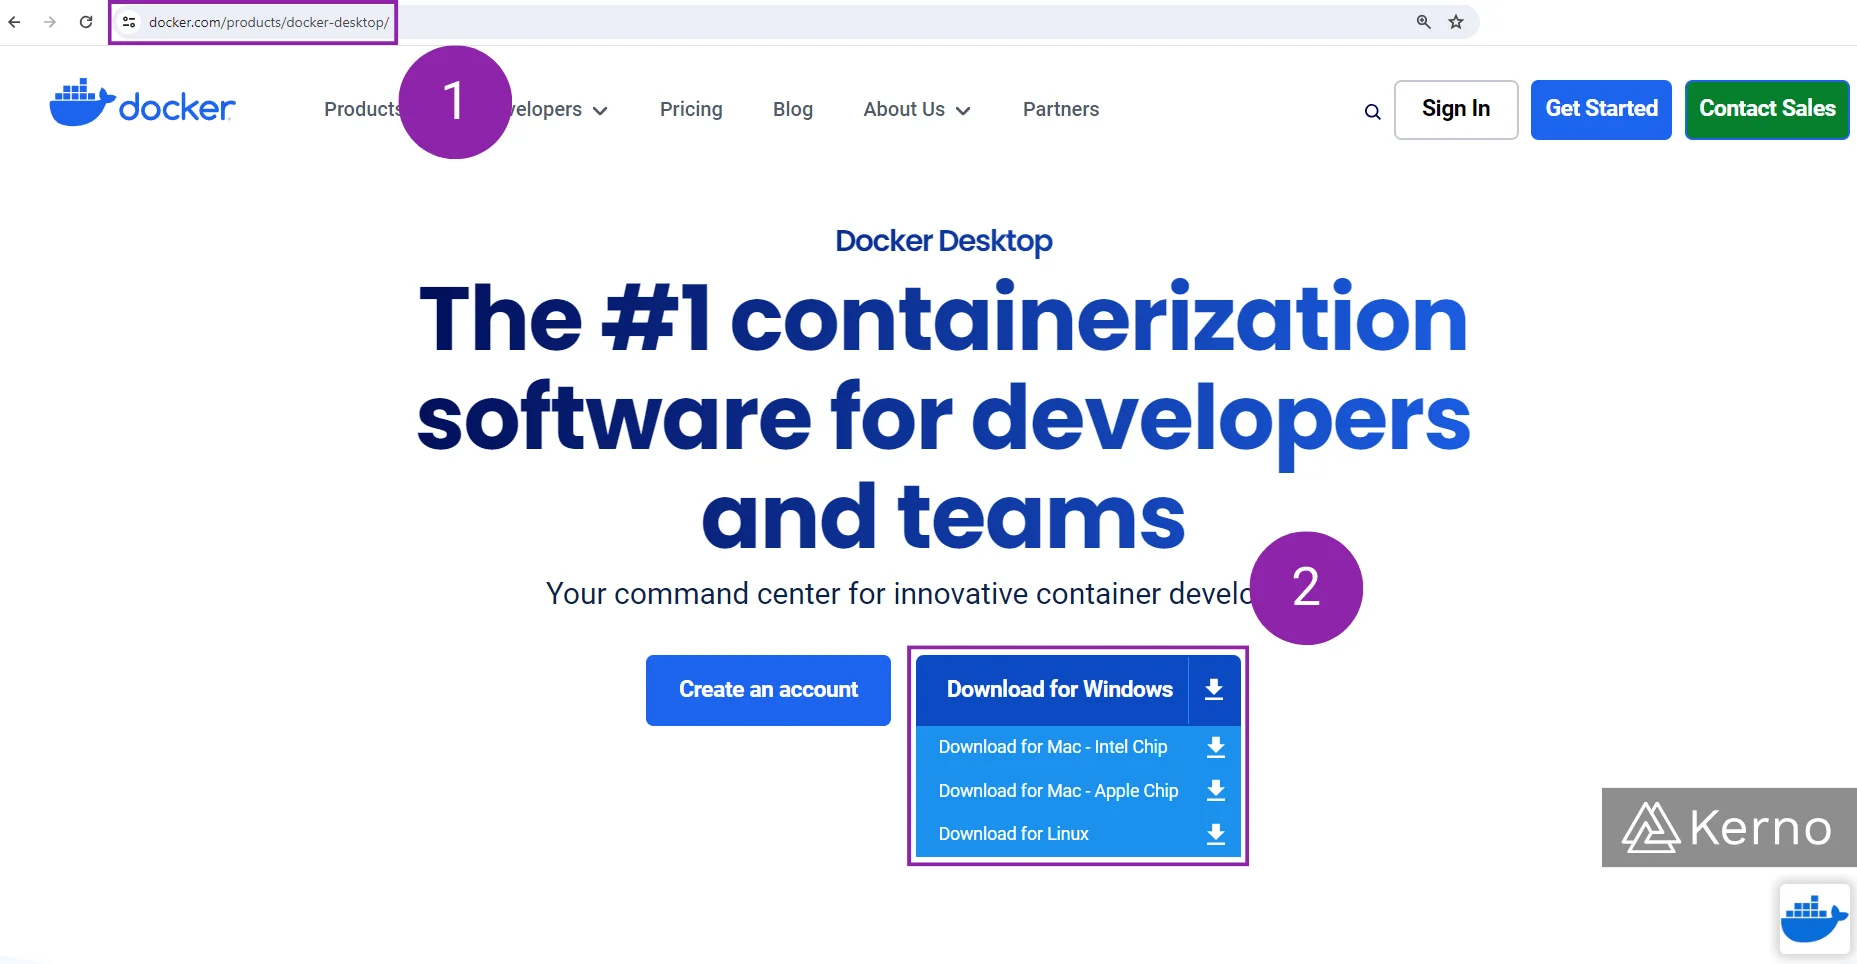
Docker Desktop can be installed on Windows, Linux, and MacOS. You should download the appropriate installer from the official website.
1.1 - Navigate to “https://www.docker.com/products/docker-desktop/”
1.2 - Your OS should be pre-selected; verify and select the right OS as needed via the dropdown.
1.3 - [Not Shown] Choose where to save the installation file.
Step 2 - Install Docker Desktop (Windows) & Create Account
As mentioned above, Docker Desktop can be installed on a variety of Operating Systems. In this section, we’re going to walk you through the installation process on Windows. Double click the file that you’ve downloaded in Step 1 and follow the instructions. For the most part, you’ll need to select the default options.
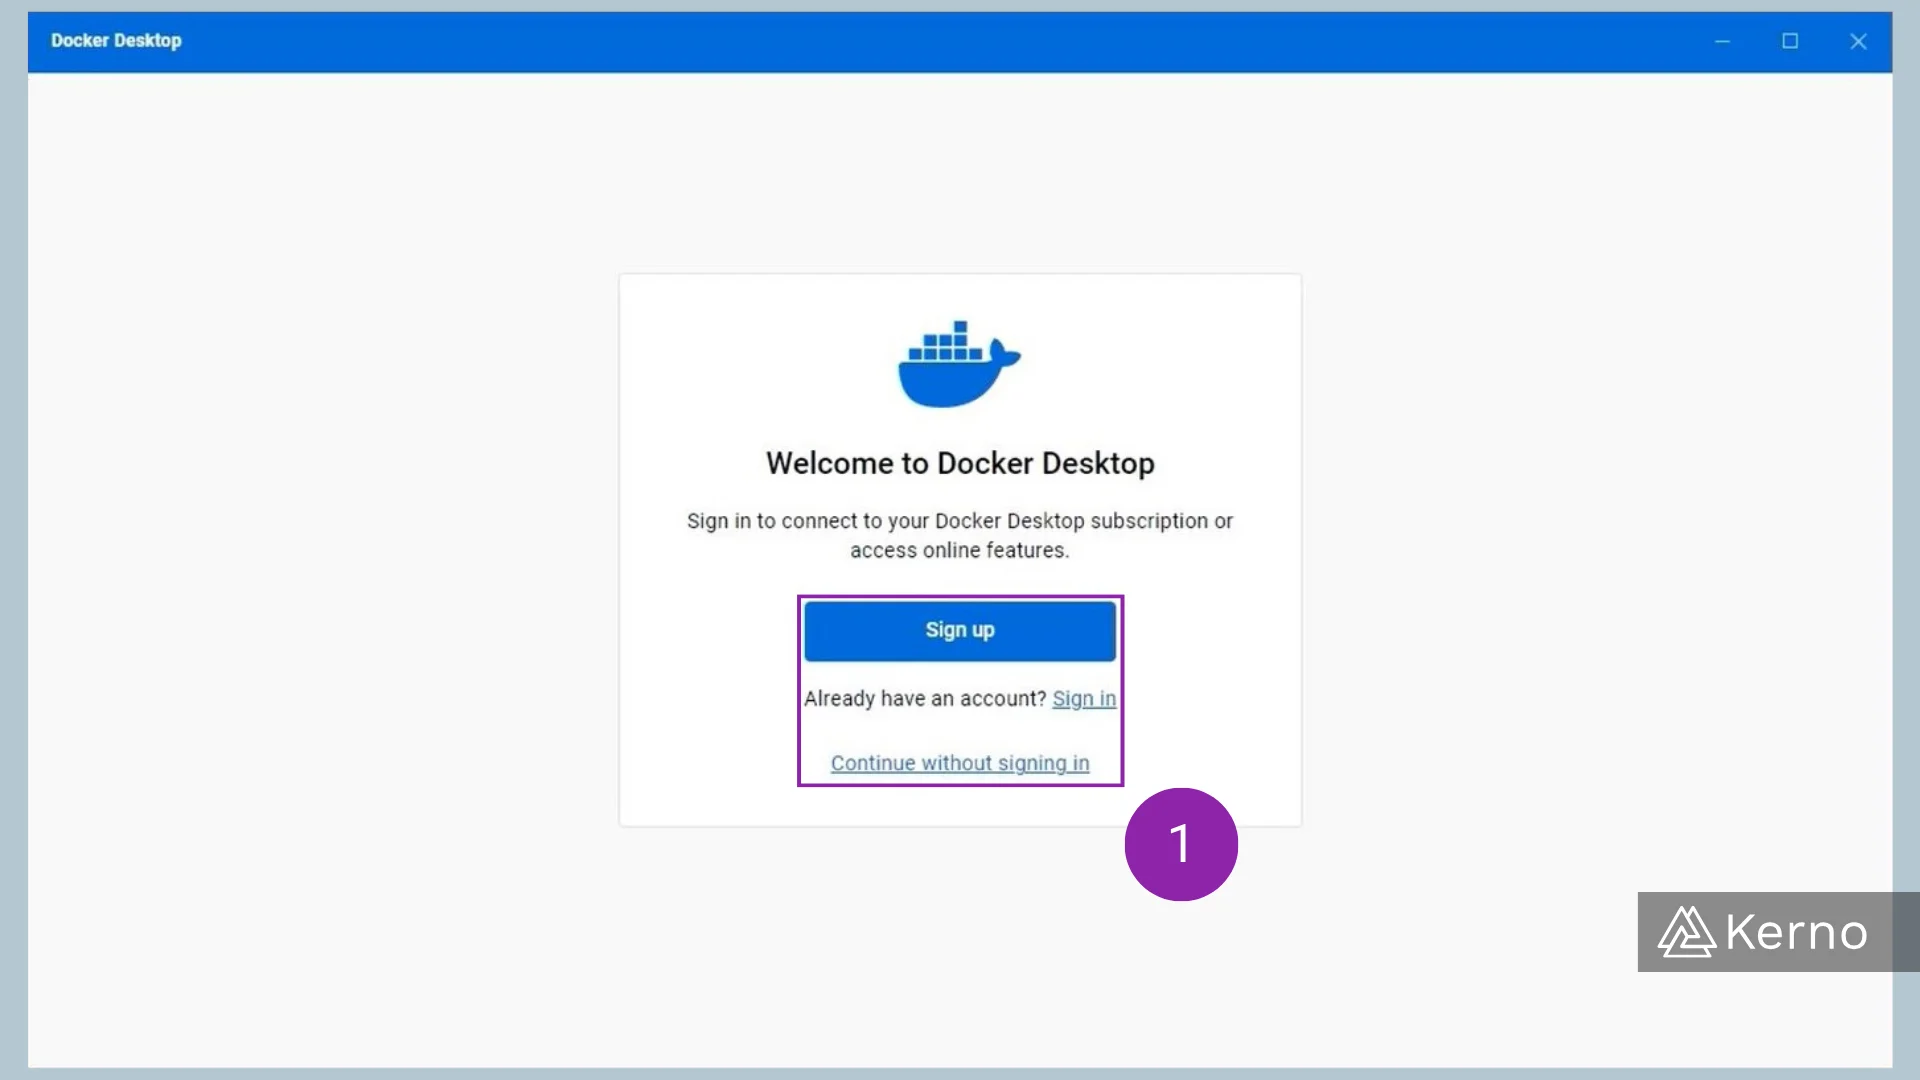
2.1 - At the end of the installation, you’ll be presented with the option of signing into your account. Click on “Sign Up” if you don’t have an account; click on “Sign In” if you already have an account; lastly, click on “Continue without signing in” if you wish to skip using an account.
It’s important to note that it’s recommended to create an account on Docker and sign into it via Docker Desktop. This will allow you to automatically browse the marketplace, download applications, and install them via Docker and Kubernetes much easier.
Step 3 - Installing Kubernetes via Docker Desktop
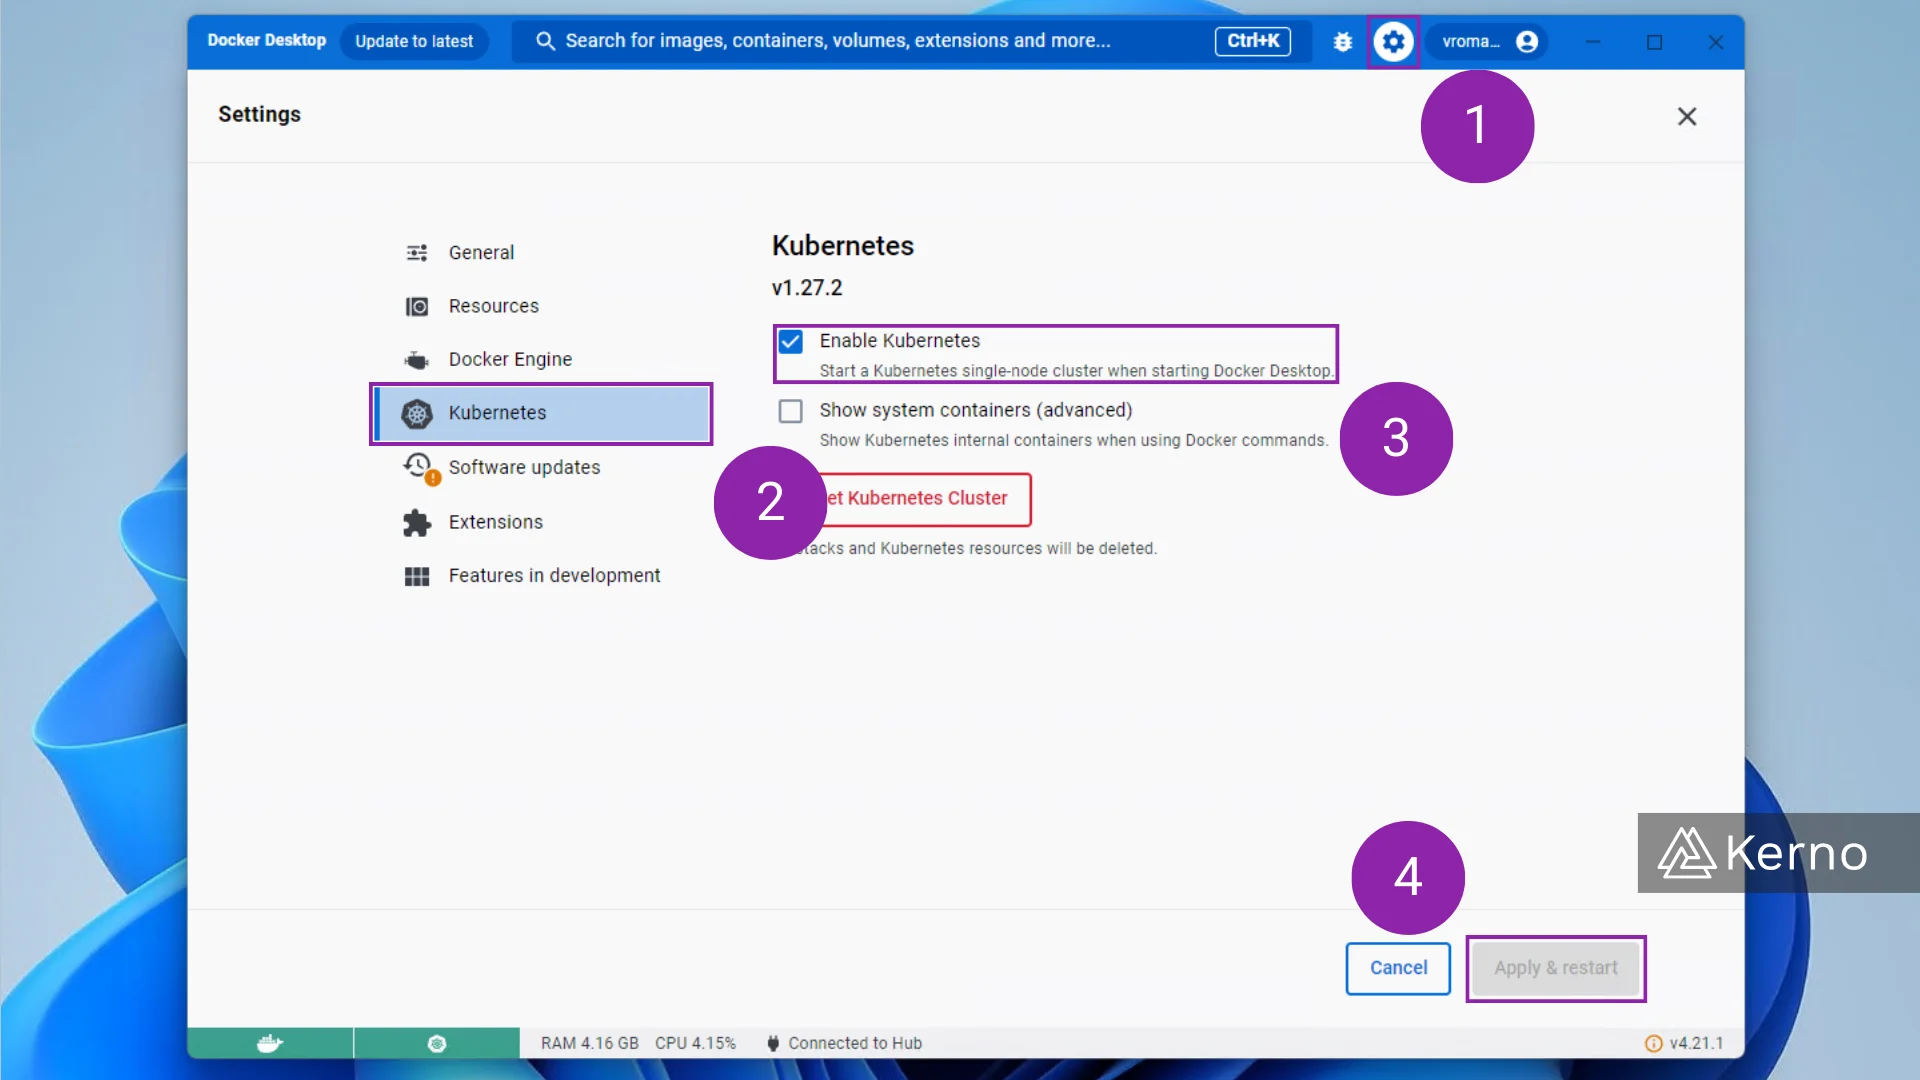
Now that you’ve got Docker Desktop configured and running on your machine, we need to enable Kubernetes. For some reason, the settings aren’t obvious for first time users.
1.1 - Go to the settings of your Docker Desktop application by pressing the gears icon in the top right corner.
1.2 - Select “Kubernetes” from the menu on the left side.
1.3 - Check the box besides “Enable Kubernetes.” Note that Docker Desktop will install the tooling required to run Kubernetes on your machine. This process may take time.
1.4 - Pres on “Apply and restart” at the bottom of the page.
Once you’ve installed Docker Desktop, launch the application and verify that everything is working as expected by running the “kubectl” and “kubectl version” commands in Command Prompt, Windows Power Shell, or in Terminal if you’re on Linux or MacOS.

Installing Kubernetes via Minikube
Minikube is a local Kubernetes utility that creates a single node cluster you can practice on. It’s an excellent tool to get your started in learning Kubernetes, test your deployments before they’re released to the corporate environment, and a great way to develop applications and see how they interact with local and remote environments.
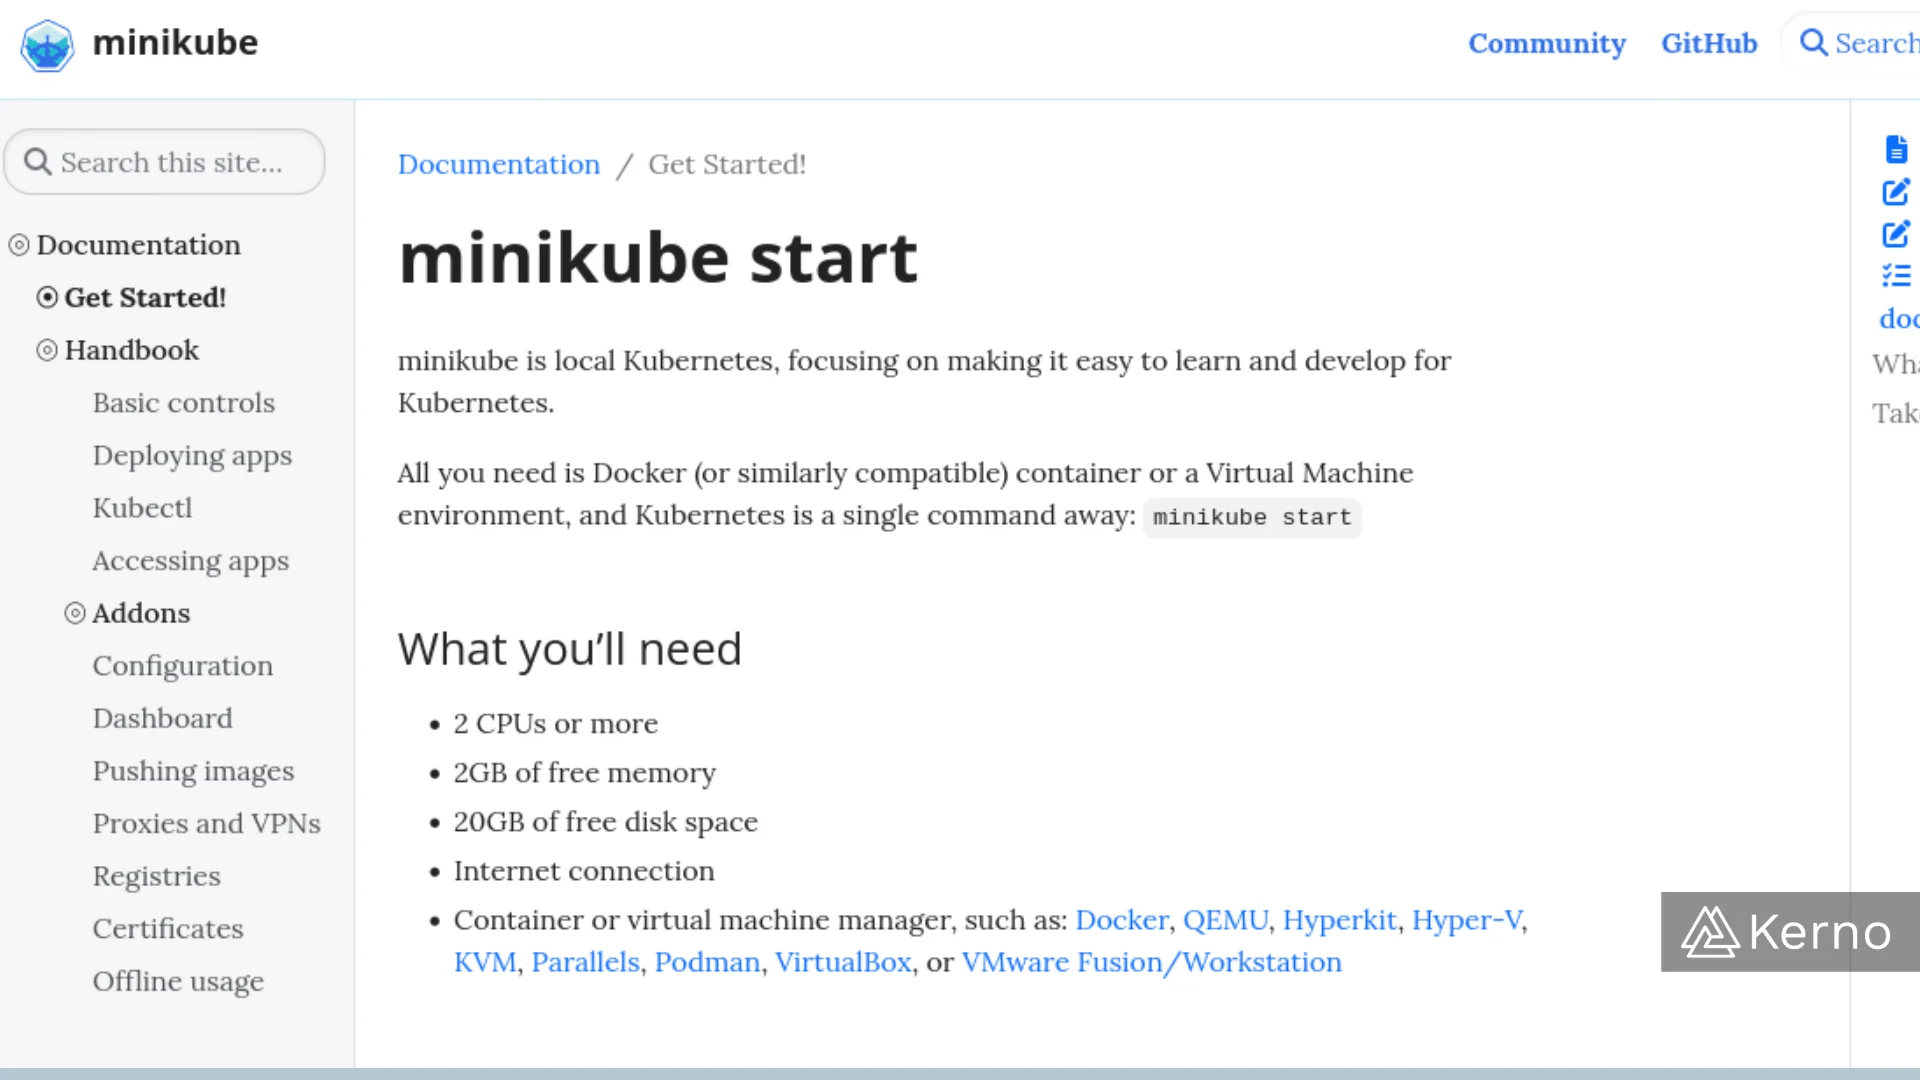
As you can see from the official documentation in Figure 5 above, you’ll need to meet a few requirements to run minikube. Although you’re likely to meet the computational requirements, it’s important to note that you’ll need a virtual machine (VM) manager. You can choose from one of the following - Docker, QEMU, Hyperkit, Hyper-V, KVM, Parallels, Podman, VirtualBox, or VMware Fusion/Workstation. Note that some of these are OS (Windows, MacOS, Linux) specific. For Windows users, we recommend either VirtualBox or VMware; VirtualBox is the only free solution.
Step 1 - Installing Minikube via Command Line Interface, Command Prompt, Terminal, etc.
1.1 - [MacOS] Issue the following command inside your Terminal to download the latest stable binary:
1.1 - [Windows] Issue the following command inside Windows PowerShell to download the latest stable binary:
1.1 - [Linux] Issue the following command inside your Terminal to download the latest stable binary:
1.2 - [MacOS] Issue the following command inside your Terminal to install the latest stable binary:
1.2 - [Windows] Issue the following command inside Windows PowerShell to add the file path to the Windows PATH directory:
1.2 - [Linux] Issue the following command inside your Terminal to download the latest stable binary:
Step 2 - Running Your Minikube Cluster
At this point, you’ve installed minikube on your machine and are ready to launch the cluster. Note that prior to launching, you won’t see any responses from the following commands. In other words, we’ve seen people get stuck due to not launching the cluster prior to using kubernetes commands.
As you issue the minikube start command, you should see a lot of actions the installer takes to run minikube on the machine.
At this point, minikube should be running on your machine. If you’ve installed Docker Desktop, you’ll have the visual confirmation of your container(s) as shown below.
Step 3 - Stopping Your Minikube Cluster
Now that Minikube is running on your machine, it’s important to understand that the service occupies a significant amount of CPU and memory space. Therefore, you should always stop minikube if you’re no longer working with the environment. You can do so by running the following command:
CMD - minikube stop
Installing Kubernetes via MicroK8s
There are other options to installing Kubernetes in a local environment; one of these options is MicroK8s. The advantage you get by installing MicroK8s versus the previous ones described is the ease of deployment of applications from local to production environment. One of the challenges in modern software development is the process of CI / CD pipelines. If you’re not familiar with the concept, it’s essentially the process that happens after code has been developed, and needs to be deployed onto production servers. By having a link between the two, developers can shorten time to test, deploy, and fix bugs that do make it into production.
MicroK8s can be installed and run on Windows, Linux, and MacOS. Let’s go through the steps of deploying it on each platform.
Option 1.1 - Installing MicroK8s on Windows
1.1.1 - Download the official latest installer here: MicroK8s Latest Installer for Windows.
Note that the installation process will check for Hyper-V on your machine. If Hyper-V ins’t installed and running (Ex - Windows 10 Home edition) you have the option to switch to VirtualBox.
1.1.2 - Run the installer and follow the instructions / prompts.
Option 1.2 - Configuring MicroK8s on Windows
Just as you would with Docker Desktop, you’ll need to allocate memory, CPUs, and harddrive space for your virtual machines. At this point, you’ll have to allocate those components for MicroK8s.
1.2.1 - Specify the CPUs, Mem and Disk for the MicroK8s installation.
Note that the minimum requirements will be filled out by the installer.
Option 1.3 - Verifying MicroK8s on Windows via PowerShell
Run the command below to ensure that the installation was successful:
Option 1.4 - Run Kubernetes on the MicroK8s Installation
At this point, you’re able to run Kubernetes nodes on your machine. Here are the commands to get you started with viewing your nodes:
Here’s the command to view your services:
Option 1.5 - Stop MicroK8s
As we had mentioned before, it’s good practice to stop the nodes that would otherwise consume your resources. Here’s the command to stop the application:
If you’d like to restart the services, here’s the command:
Option 2.1 - Installing MicroK8s on MacOS and Linux
We will be installing MicroK8s on a Mac using Homebrew. The steps should be similar if you’re using a different package manager.
2.1.1 - Install Homebrew by running the following command:
Note that you can navigate to https://brew.sh/ to troubleshoot any issues you may encounter with the Homebrew installation process.
2.1.2 - Install MicroK8s via the following command:
The command above will download and install Multipass - it’s a VM system for MacOS that will be used to run packages required by MicroK8s.
2.1.3 - Initialize MicroK8s via the following command:
Option 2.2 - Verifying MicroK8s on MacOS and Linux via Terminal
Run the command below to ensure that the installation was successful:
Option 2.3 - Run Kubernetes on the MicroK8s Installation on MacOS and Linux
At this point, you’re able to run Kubernetes nodes on your machine. Here are the commands to get you started with viewing your nodes:
Here’s the command to view your services:
Option 1.5 - Stop MicroK8s on MacOS and Linux
As we had mentioned before, it’s good practice to stop the nodes that would otherwise consume your resources. Here’s the command to stop the application:
If you’d like to restart the services, here’s the command:
Conclusion on MicroK8s Kubernetes
MicroK8s is an excellent option to run Kubernetes on your local machine. It’s also a great option for connecting your local environment to the production environment you plan to deploy your applications to.
Conclusion on Installing Kubernets on a Local Machine
We’ve looked at a number of options that allow an end-user to run Kubernetes and test applications before deploying them into production - Docker Desktop, minikube, MicroK8s. There are additional options we invite you to explore that we haven’t covered; some examples include K3s, Kubeadm, etc.