.jpg)
Introduction
Jira is an agile project management tool built for tracking issues and projects in progress, which is widely used in the IT industry. You can simply treat it as your team's platform for coding, collaboration, and release stages. As a DevOps Engineer, it is undeniably an important tool to automate and integrate the software development process and other IT teams like infrastructure, operation, and quality assurance teams.
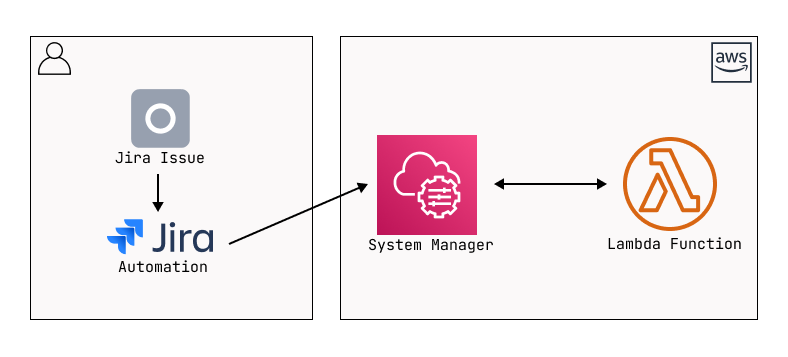
In this article, we will learn how to use AWS SSM to expand the power of Jira with its automation feature and inspire you to design automation rules for your DevOps solution.
Jira Automation
Jira automation is a powerful feature that allows you to customize rules to streamline and enhance your workflows with if-this-then-that-rules based on events on Jira. Tons of behaviors you have done on Jira could become a trigger for others. It is also integrated with popular third-party tools or platforms like AWS SSM Document, Azure Runbook, GitHub, GitLab, Bitbucket, and Slack.
Some simple examples of using Jira automation,
- Create a feature branch on a GitHub repository for a newly created Jira issue.
- Inform other teammates on a Slack channel when an issue has been marked completed.
- Trigger an AWS SSM Document when an issue has been transitioned to the next stage.
- Assign an issue to a tester while passing to the QA stage.
The above examples showed how automation makes Jira a central hub of your IT department, and there are more and more things it can do for you.
AWS System Manager (AWS SSM)
AWS SSM is a service that manages and automates operational tasks across your AWS resources. It simplifies the maintenance of infrastructure in a safer and more centralized way. It is divided into five units which are Operations Management, Application Management, Change Management, Node Management, and Shared Resources. These units cover a lot of common operational tasks.
From these five units, there are some sample use cases below,
- Using Parameter Store in Application Management to centralize the storage of data, secrets, or other types of data.
- Run Command in Node Management enables users to remotely execute commands on your EC2 instances or on-premises servers without manual interventions.
- Define and automate complex tasks across AWS resources using Automation in Change Management
The power of AWS SSM is not limited to the above use cases. It has become an important tool for DevOps or Site Reliability Engineers on daily operation tasks like patching, resource management, and inventory.
Prerequisites
What you will need to follow along with this article:
- A Jira account with a project configured.
- An AWS account with the permission on IAM role, SSM and Lambda
- You need to be familiar with using the AWS Console
From the items above, we can create the workflow that triggers a Jira automation rule, then run an AWS SSM Document that invokes a Lambda Function and returns a “Hello World!” message.
Preparation on AWS
In this article, we will use the AWS Console for all resource creation and configuration. Therefore, please log in to your AWS Console before you start. We will use the `us-east-1` region as an example.
Link to console: https://us-east-1.console.aws.amazon.com
IAM Role
Jira automation uses IAM-based integration for connecting to any non-SNS resources. It means except for connecting to AWS SNS resources, we will need a separate IAM Role.
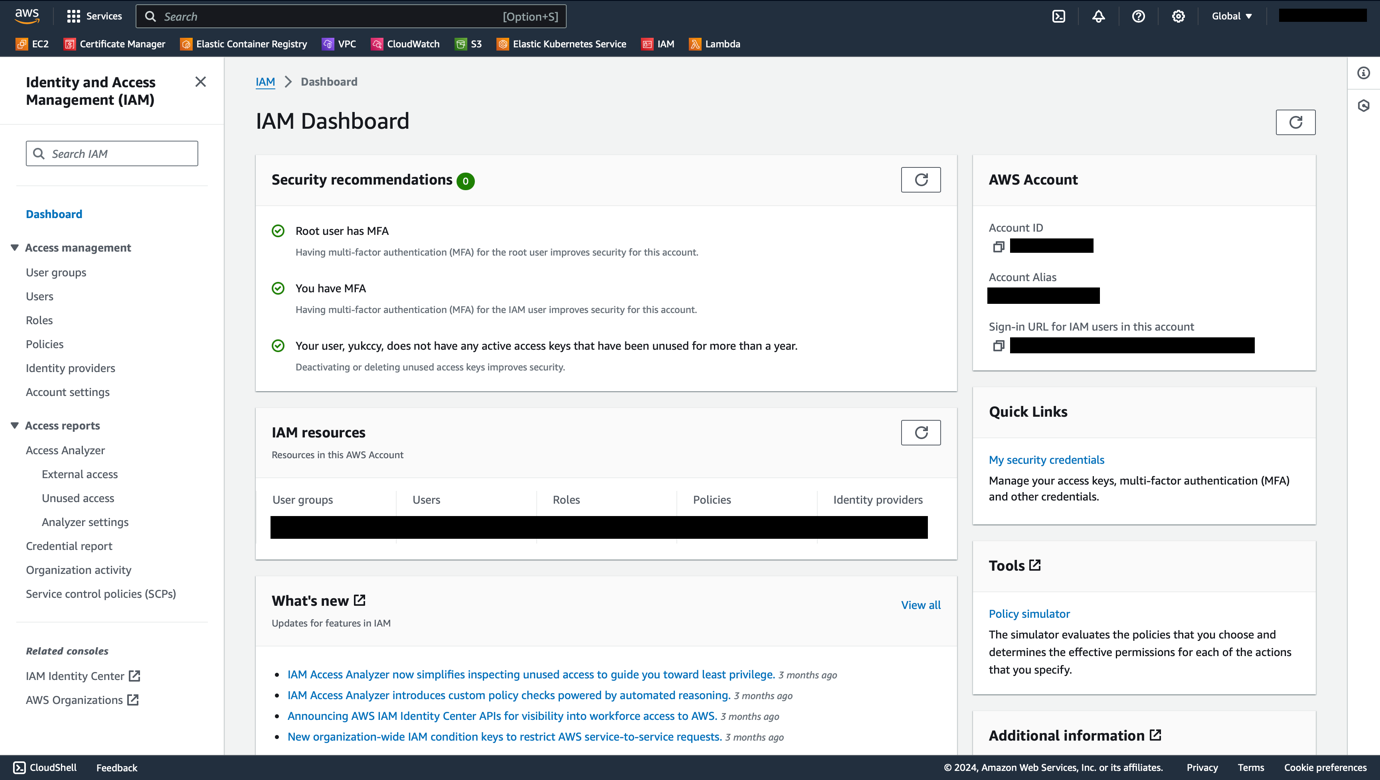
- Go to the IAM Dashboard.
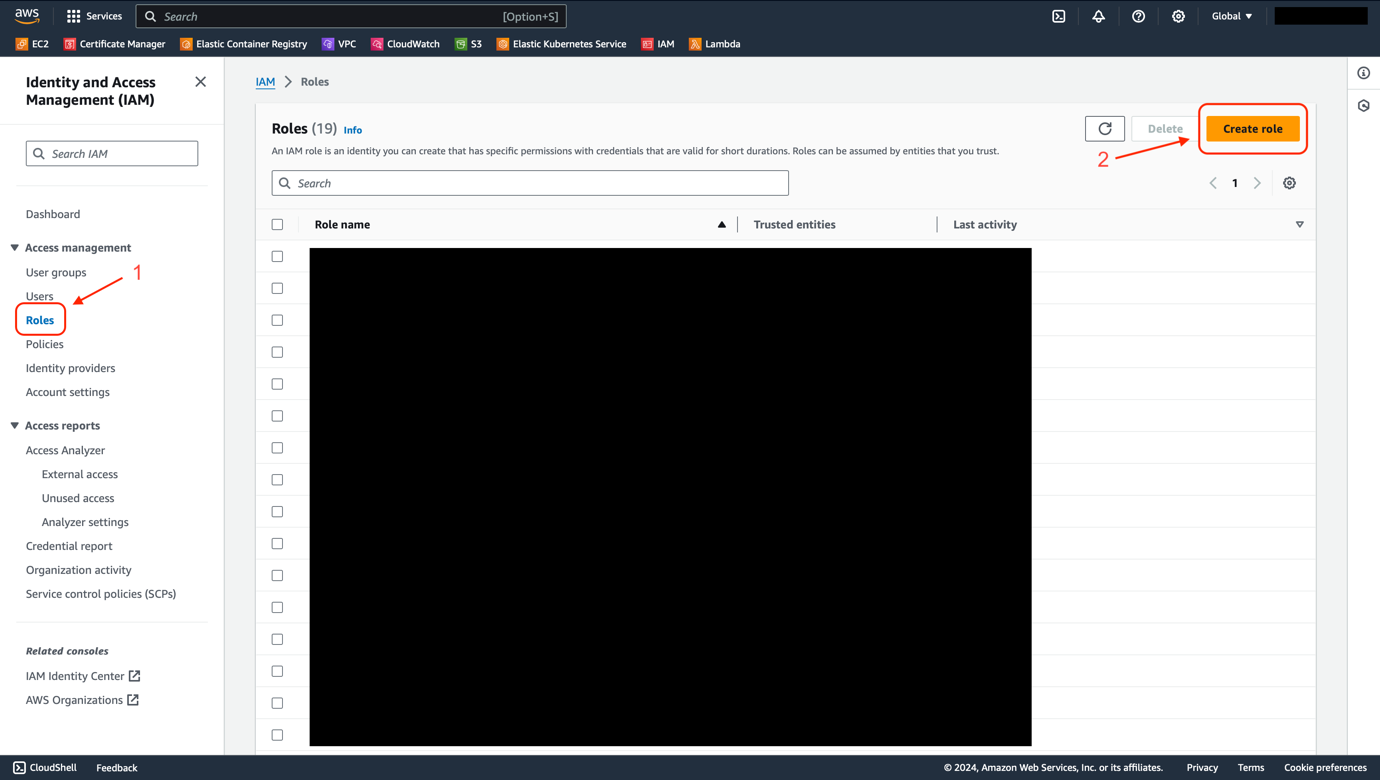
- Choose Roles from the navigation menu, then click the Create Role button.
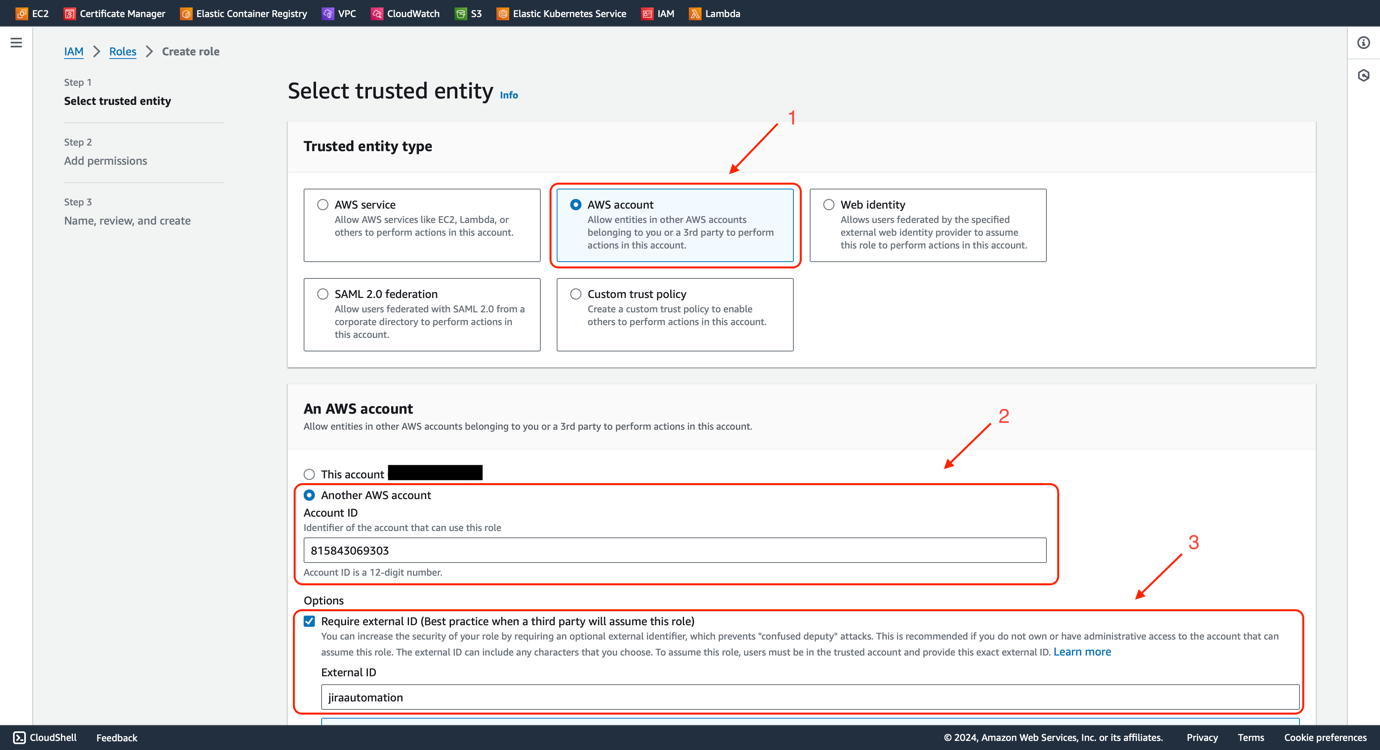
- Choose AWS Account as the Trusted Entity Type.
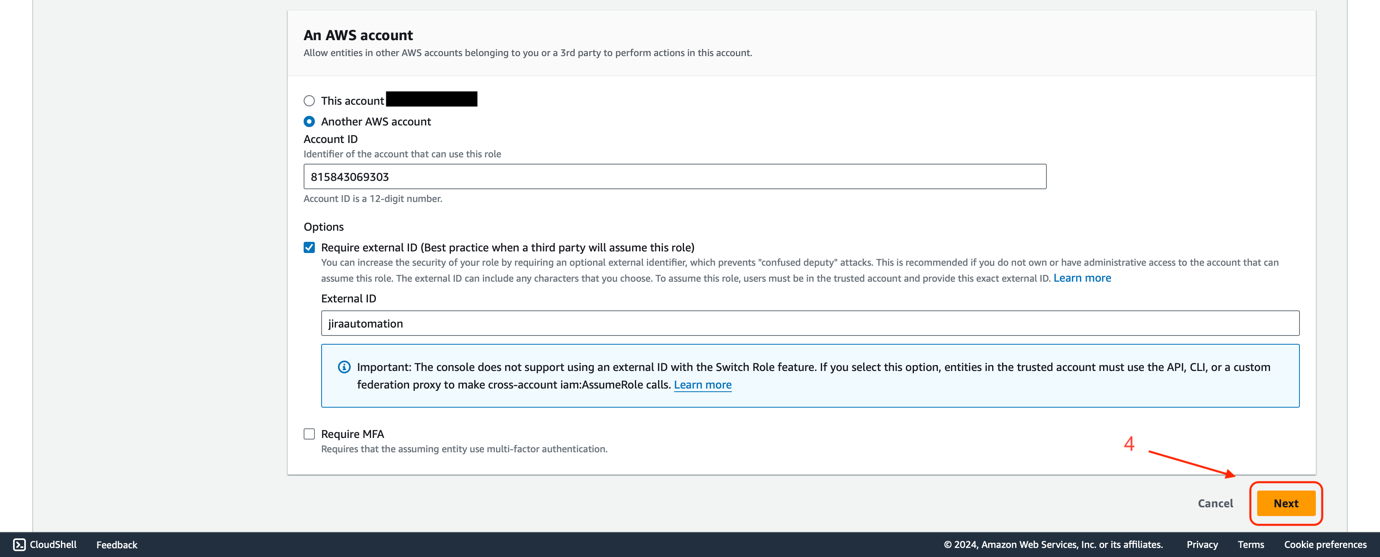
- Select Another AWS account and enter the Atlassian Automation AWS account ID: 815843069303.
- Select Require external ID and enter a random ID which we will use while setting up AWS connection on Jira. We use jiraautomation as an example.
- Click Next.
- Click Next without selecting any permission as we will create inline policies later.

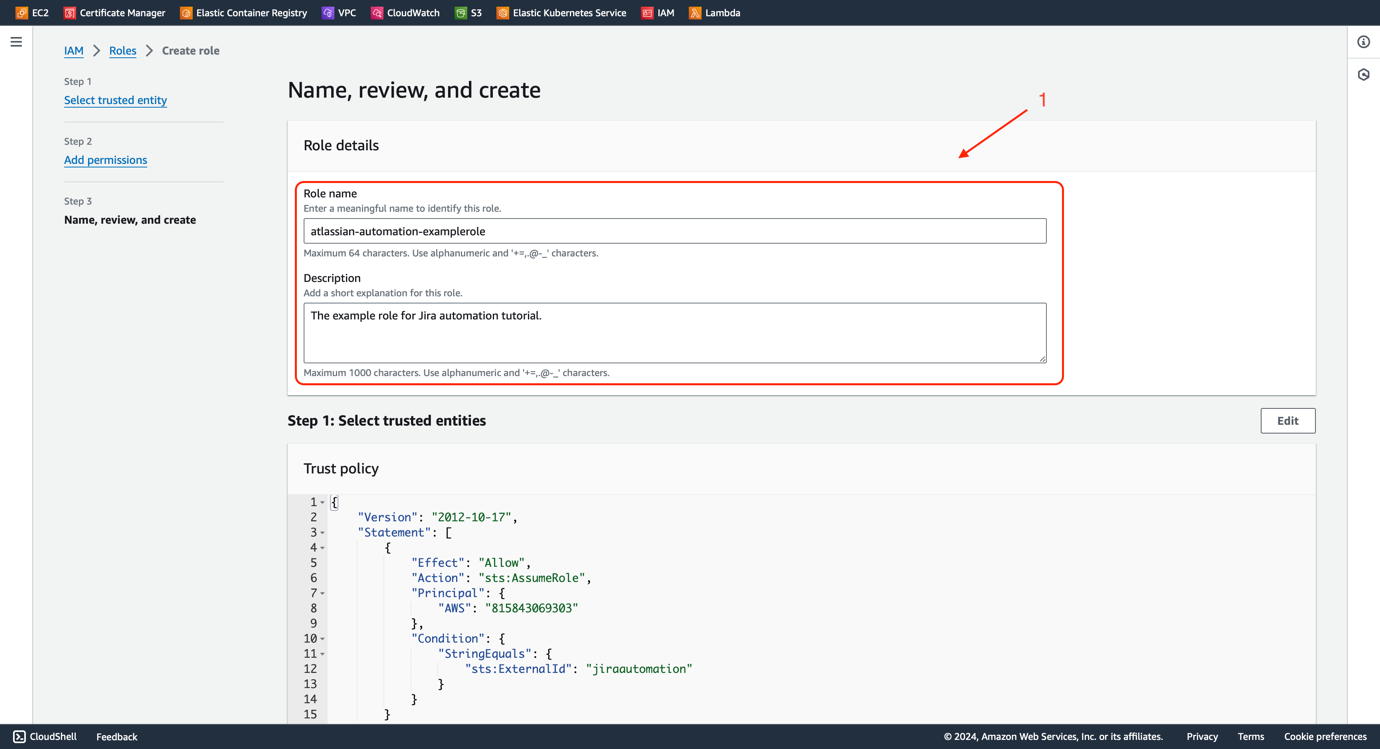
- Enter a Role name and Description. The role name must begin with `atlassian-automation-`.
- Review your configuration, then click Create role.

- Go back to the Role dashboard and search for the newly created role.
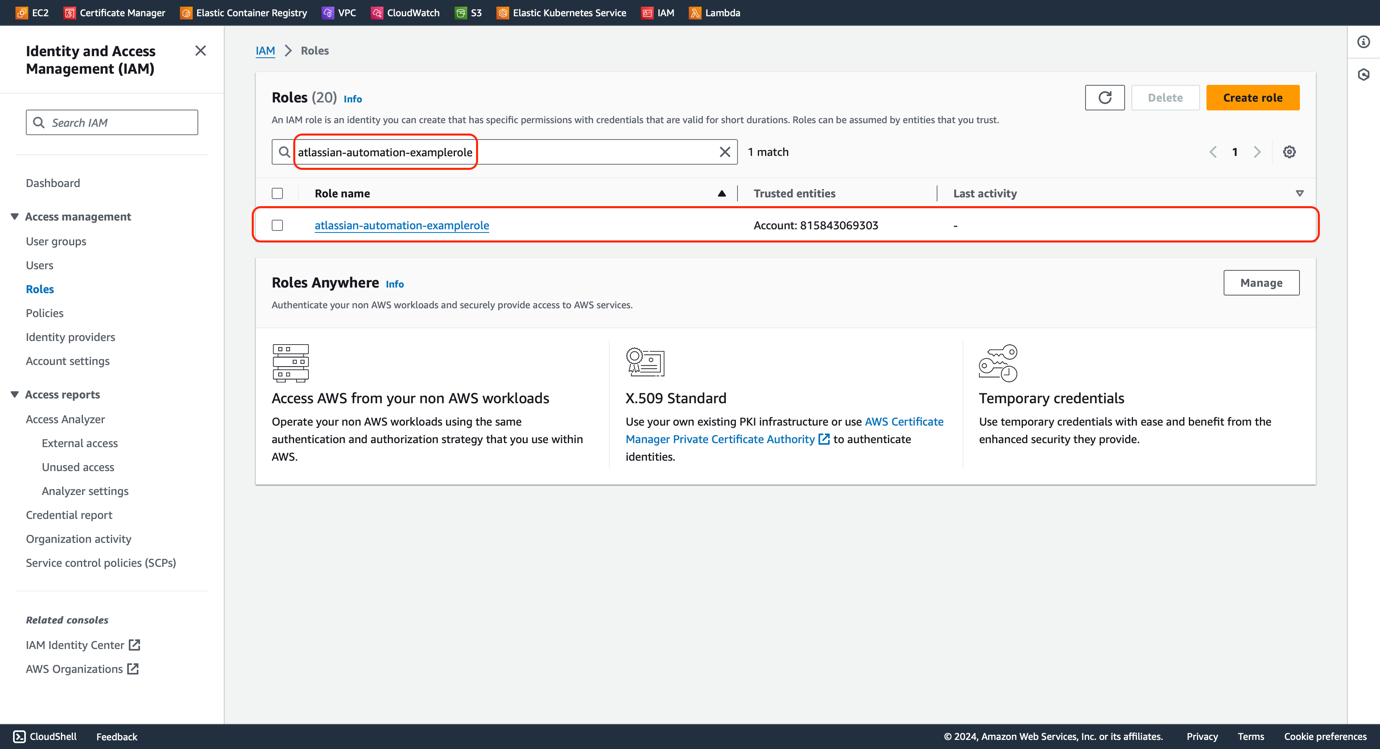
- Select the role from the search result.
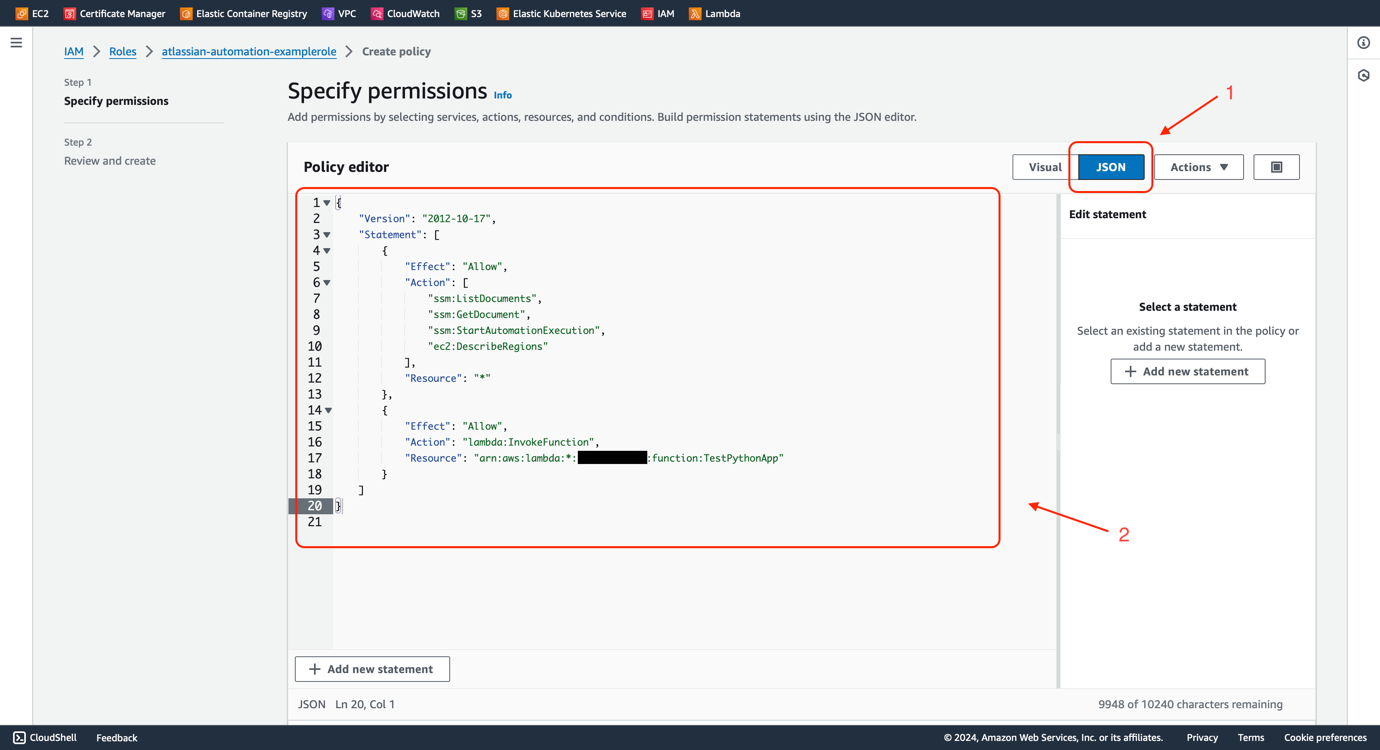
- Select Create inline policy from the pull-down menu Add permissions.

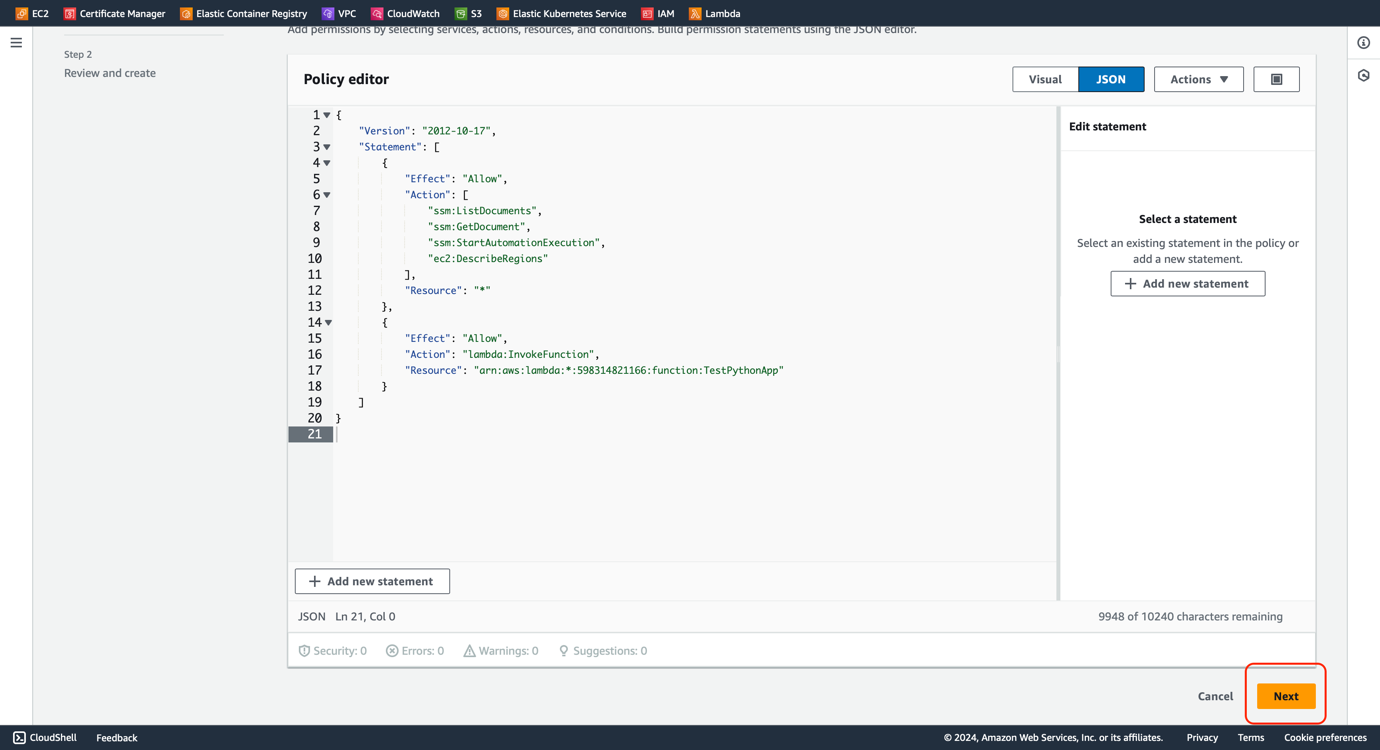
- Select JSON as the display mode of the policy editor.
- Write the JSON policy with the following permissions.
- List SSM Documents.
- Get SSM Document.
- Start an Automation execution.
- List all available AWS regions.
- Invoke a Lambda Function with a specific name.
- Or you can use the following example by replacing some fields with your value.
- Replace <AWS Account ID> with your AWS account ID.
- Replace <Lambda Function Name> with the name of the Lambda Function we will create soon. We will use TestPythonApp.
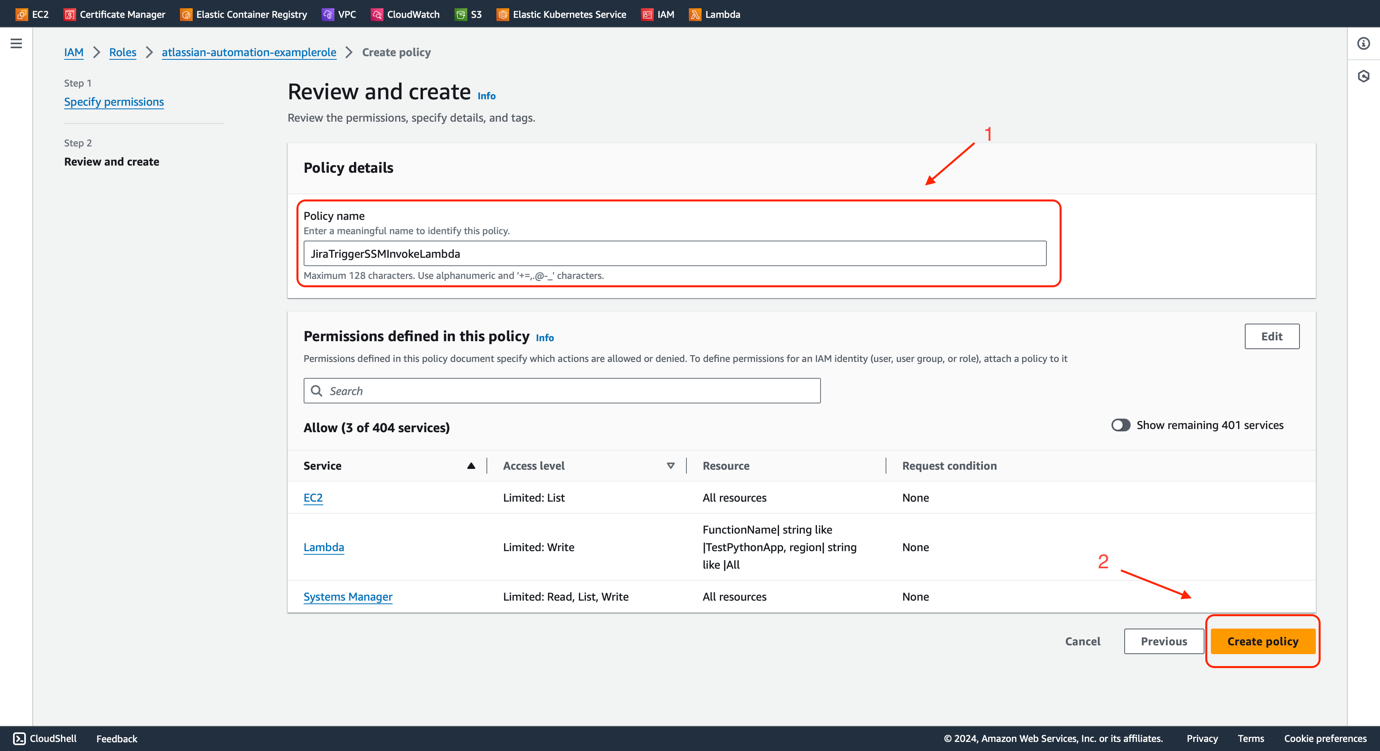
- Click Next.
- Enter a policy name.
- Review the permissions and click Create policy.
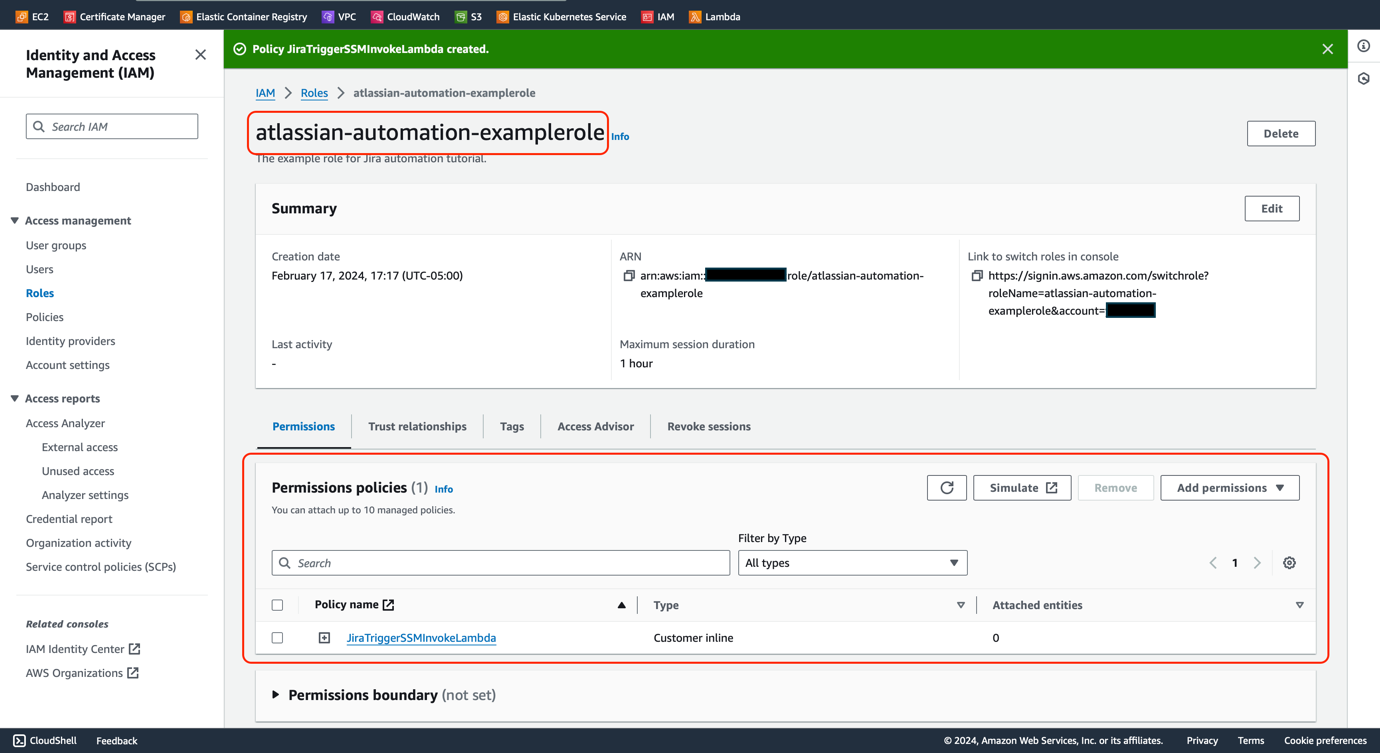
Now, you have an IAM role with the necessary permissions for Jira automation.
Lambda
In this example, we will create a simple Lambda Function. When our Jira automation rule triggers the SSM Document, it will invoke this Lambda Function.
Lambda Function is commonly used in DevOps solutions with different use cases because of its serverless and scalable feature. As it supports popular programming languages like Python, Java, Node.js, Ruby, and .NET, it extends the possibilities of integrating different platforms with Jira automation rules. In later sections, you will see some examples of how it helps DevOps solutions.
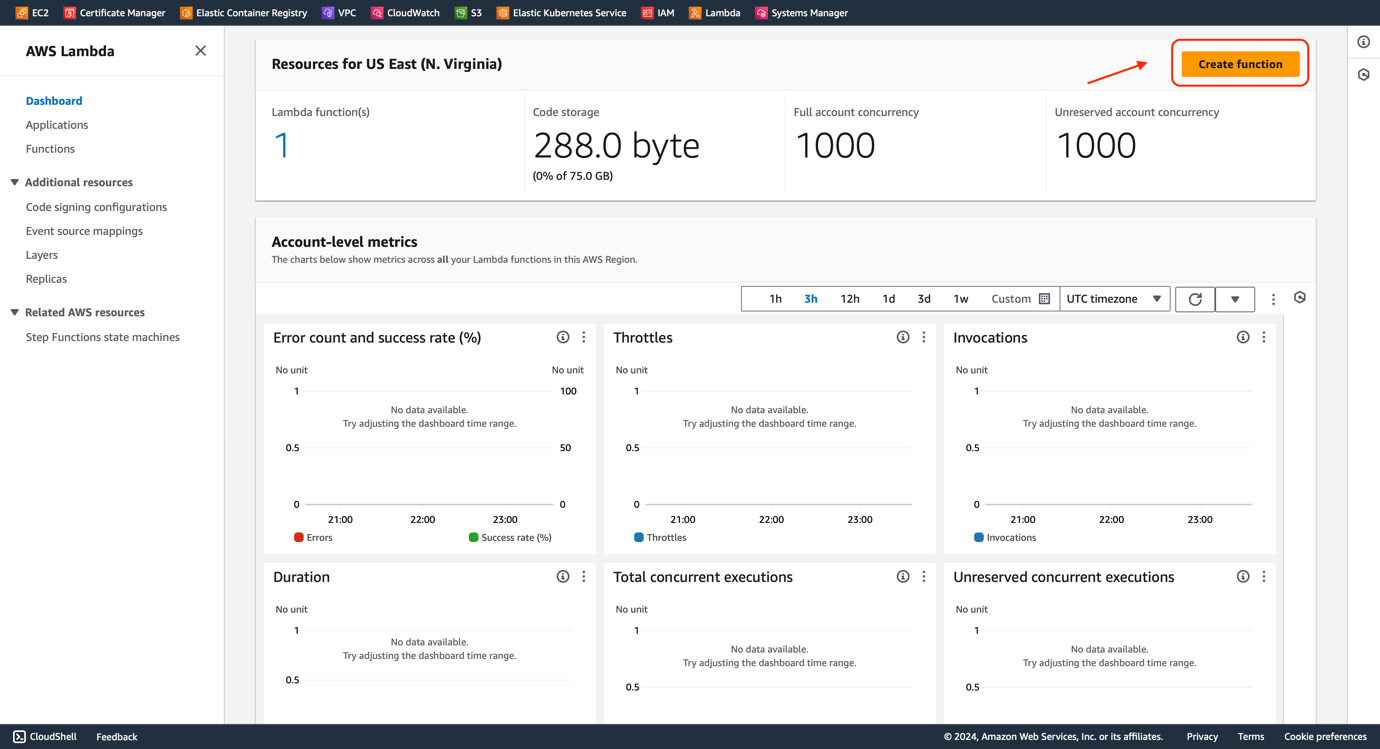
- Go to the Lambda Dashboard.
- Click the Create function button.
- Select the Author from scratch.
- Enter the Function name. You should use the same name “TestPythonApp” while creating the inline policy of the IAM Role created in the previous section.
- Select Python 3.12 for Runtime. The version number could be different as AWS continuously updates it to the latest Python version.
- Leave the remaining fields to default. Click the Create function button.

- You now have a Lambda function.
- Replace the default Code Source with the following lines,


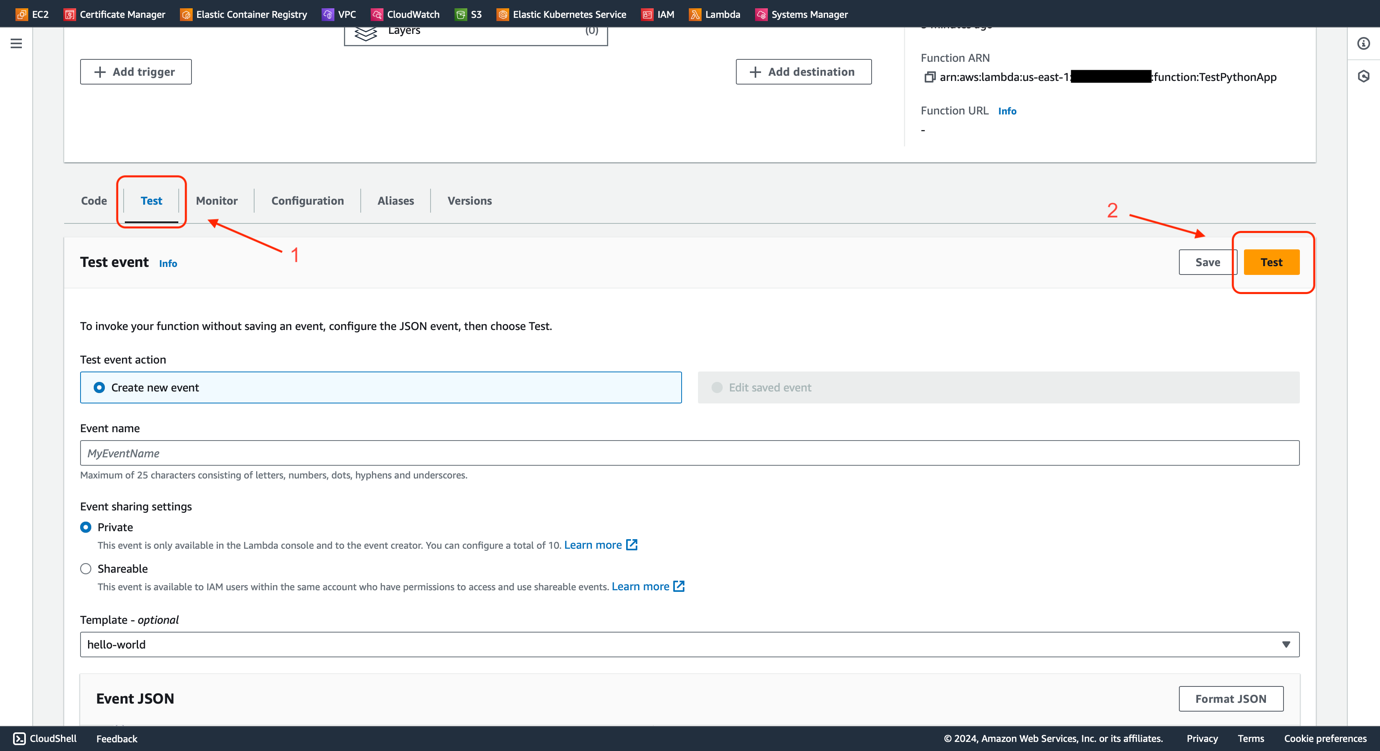
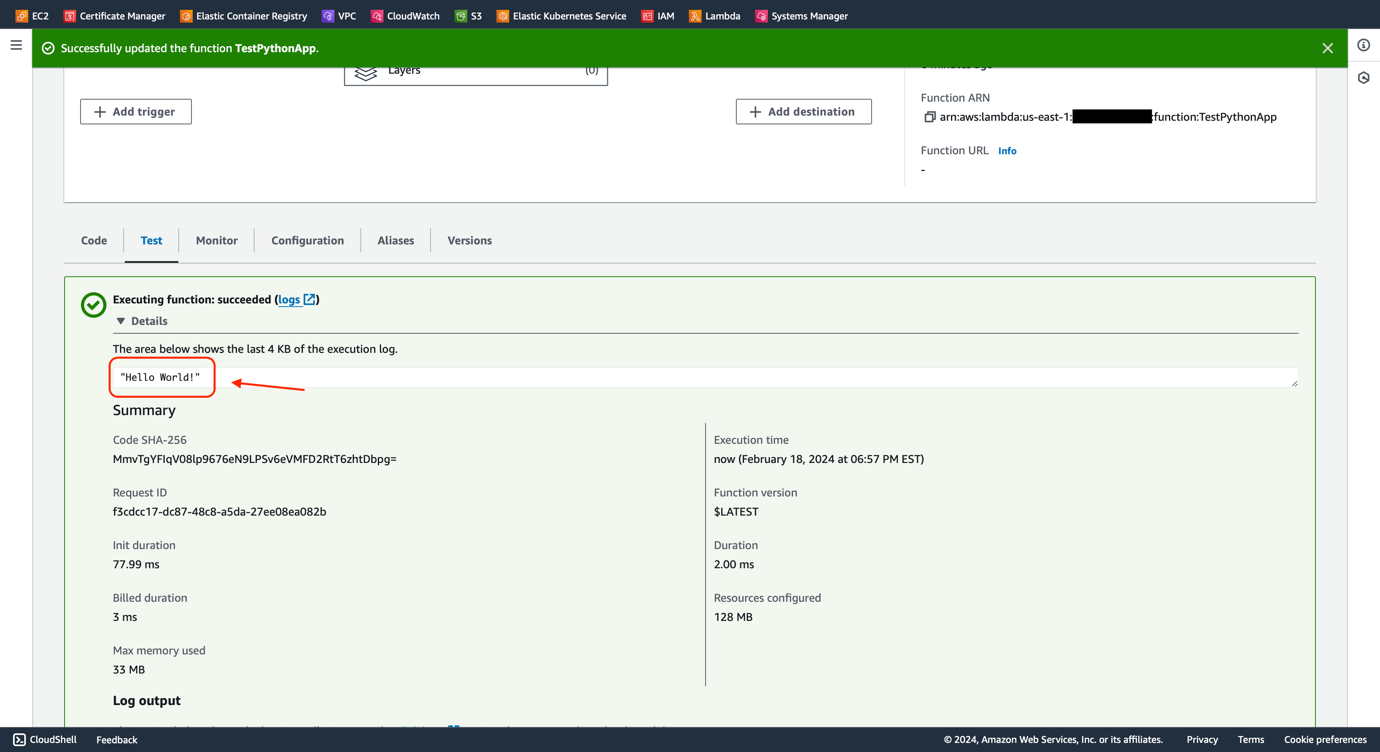
- Select Test from the tab.
- Click the Test button.
- The function should be executed successfully with a “Hello World!” as the return.
Now you have a simple Lambda Function ready to invoke.
SSM Document
Finally, we need an SSM Automation Document which will be specified while setting up the Jira automation rule. When this document is being executed, it will invoke the Lambda Function we created in the previous section.
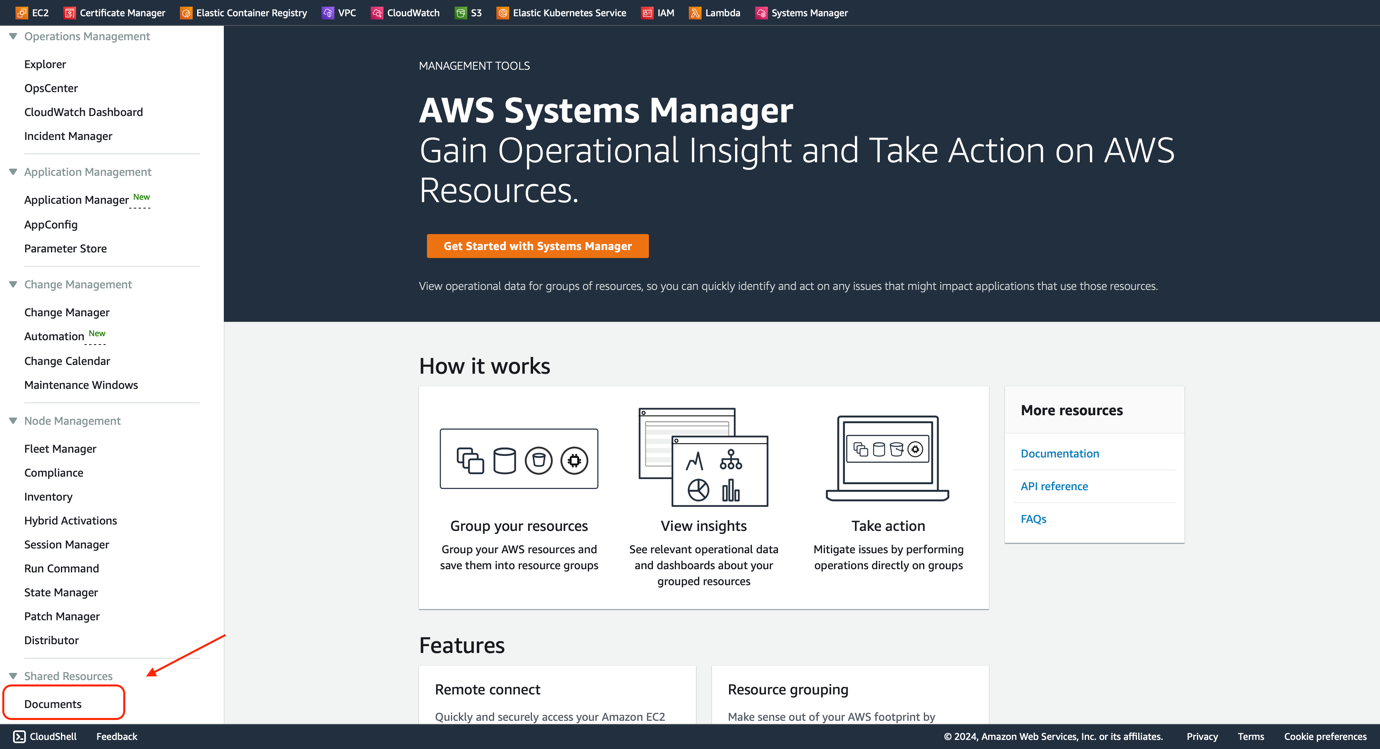
- Go to the System Manager Dashboard
- Choose Documents from Shared Resources in the navigation menu.

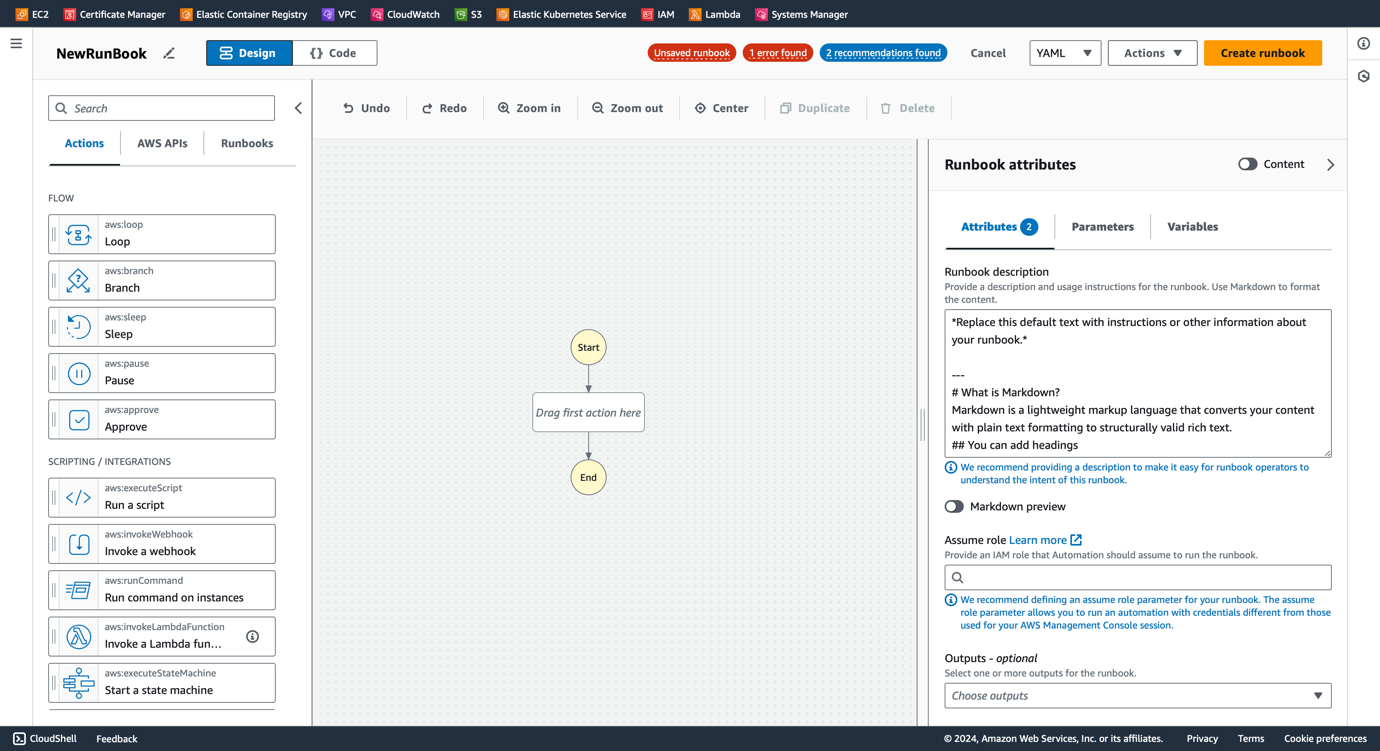
- Click Create document, then choose Automation from the pull-down menu.
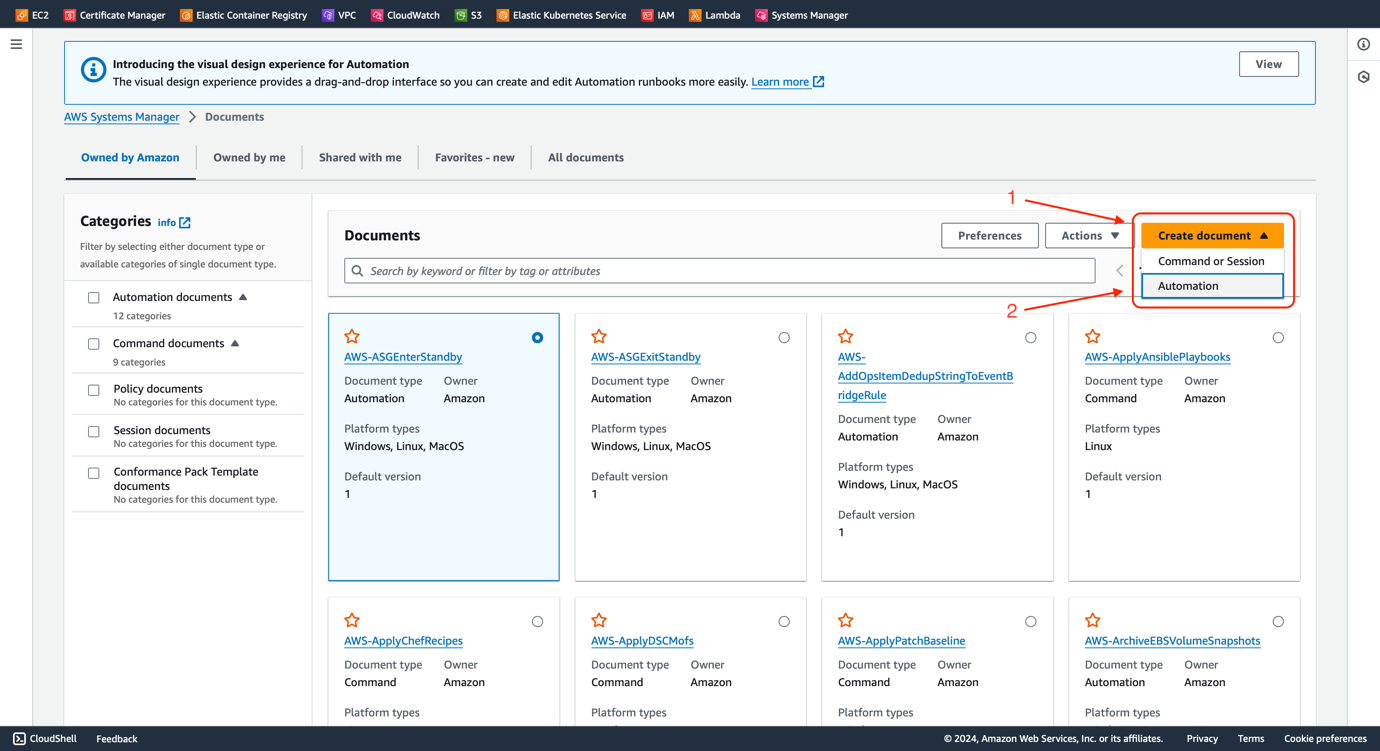
- You will see a design panel.
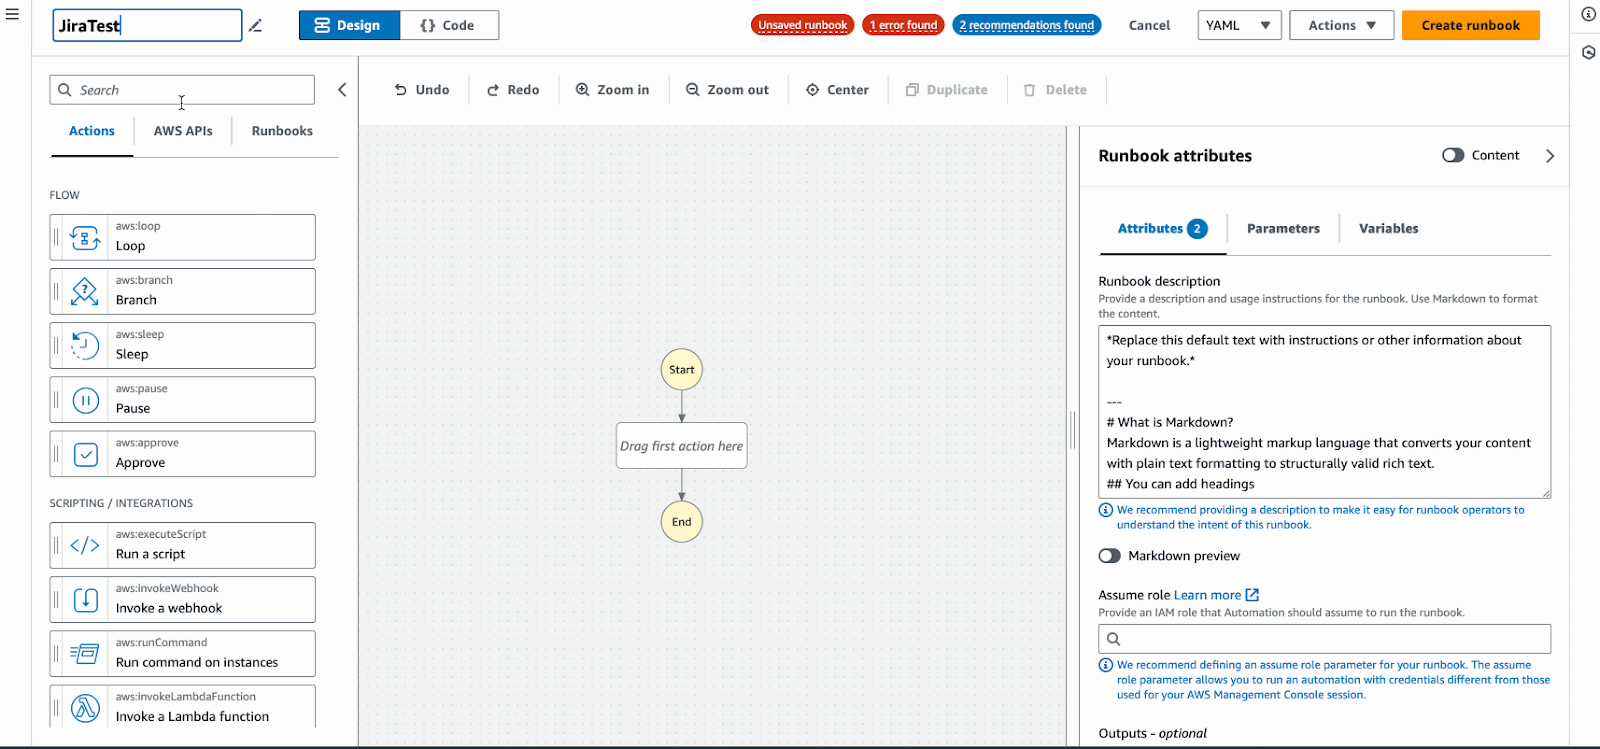
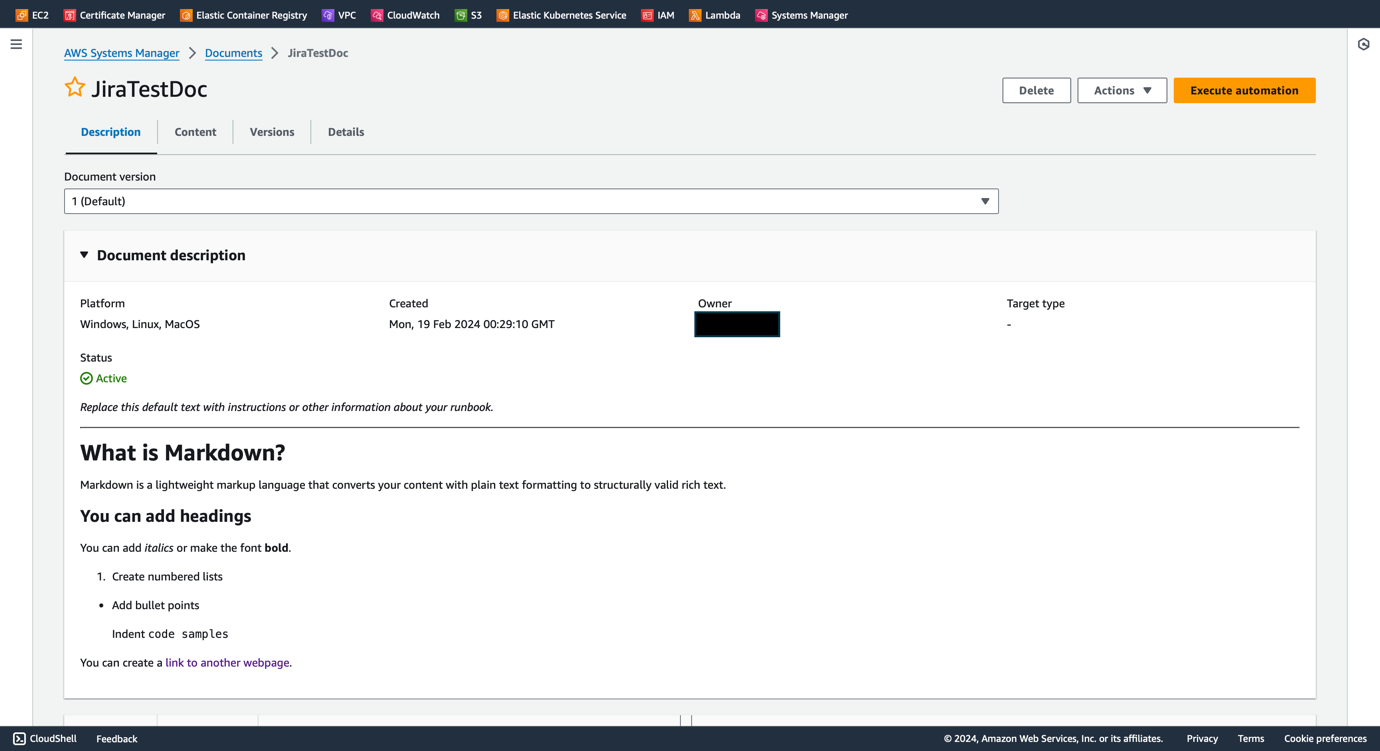
- Update the document name. We use JiraTestDoc as an example.
- Pull Invoke a Lambda Function from the Actions menu to the design panel.
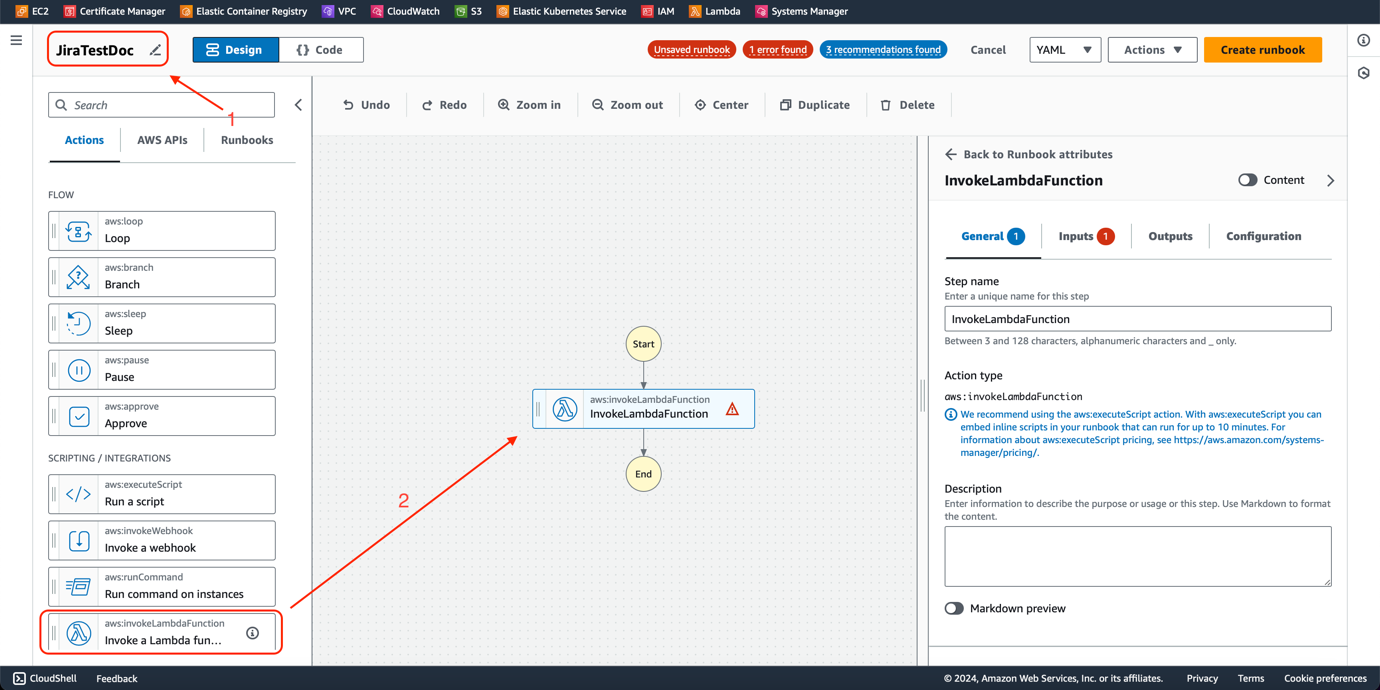
- Choose Inputs from the tab in the menu.
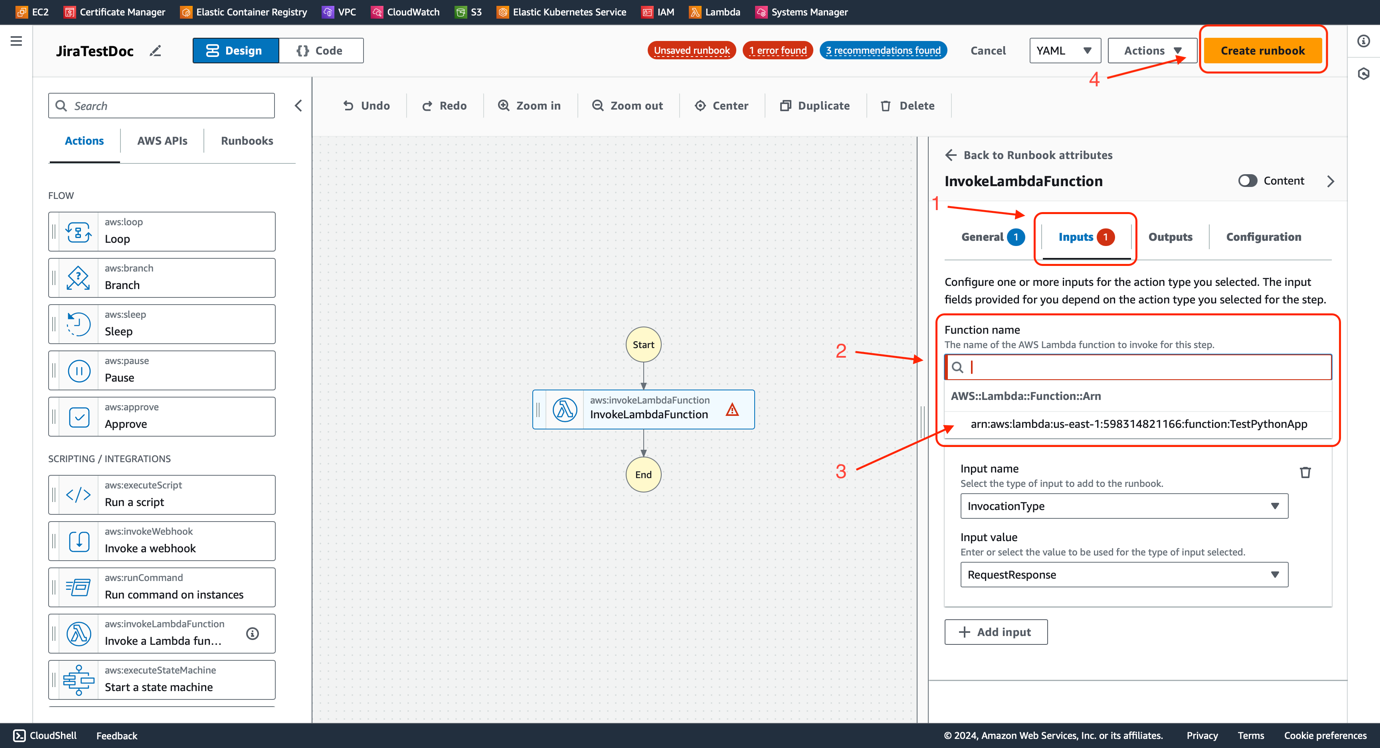
- Open the Function name pull-down menu.
- Select the Lambda Function TestPythonApp we created in the previous section.
- Click Create runbook button.
- Ignore the recommendation window. Click Create runbook button.

Now you have got an SSM Automation Document.
Preparation on Jira
After we have prepared all the necessary resources on AWS, the final step is to create a Jira automation rule to trigger the execution of the SSM document. Then, we trigger the rule by transitioning an issue status from In Progress to Done.
- Go to your Jira project Kanban board.
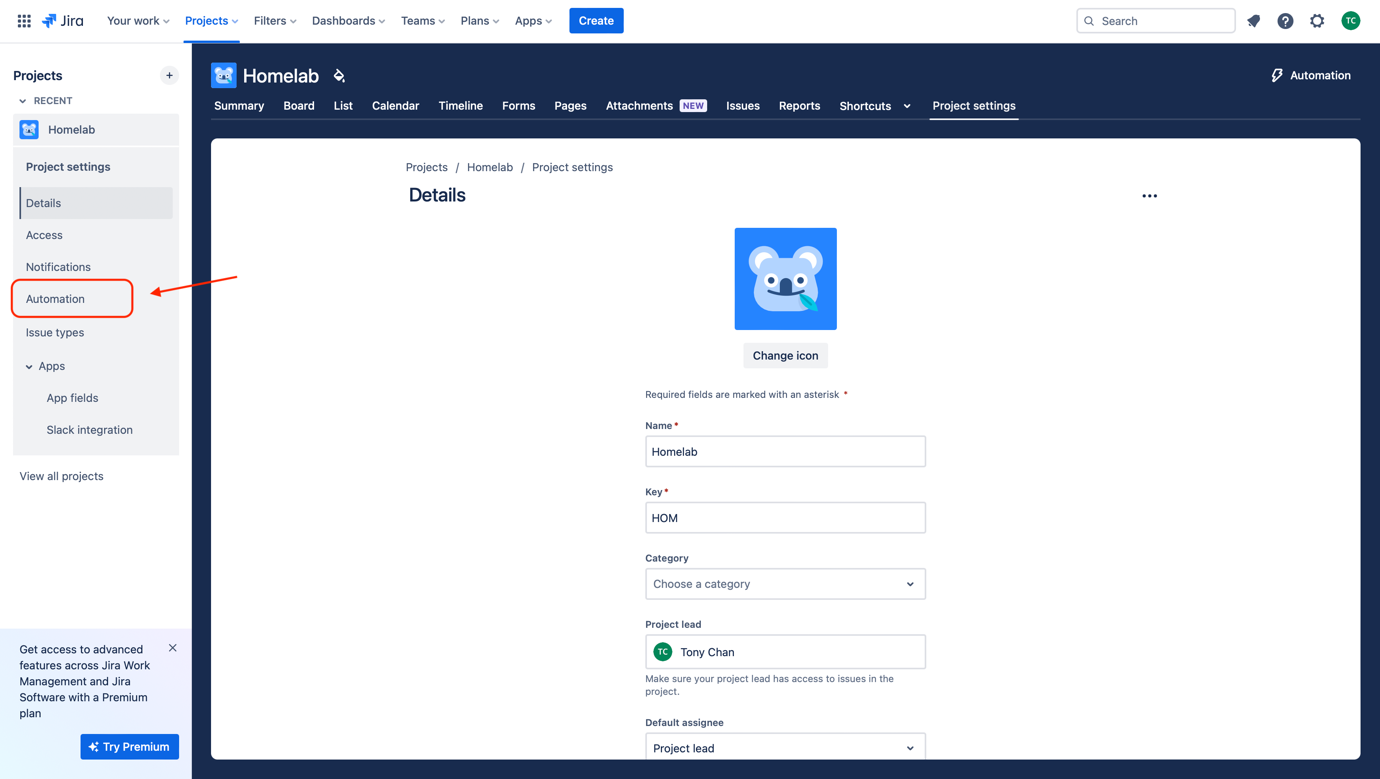
- Choose Project settings from the tab.

- Select Automation from the navigation menu.
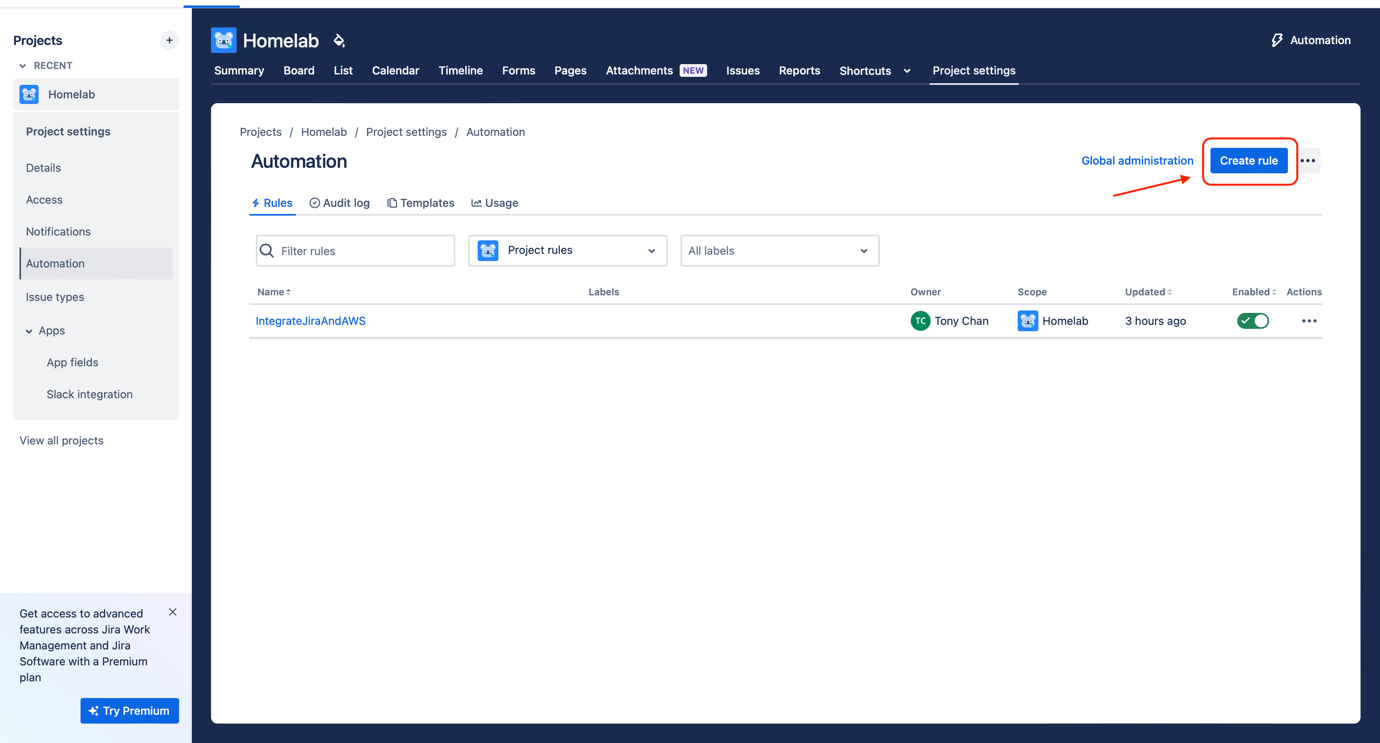
- Click the Create rule button.
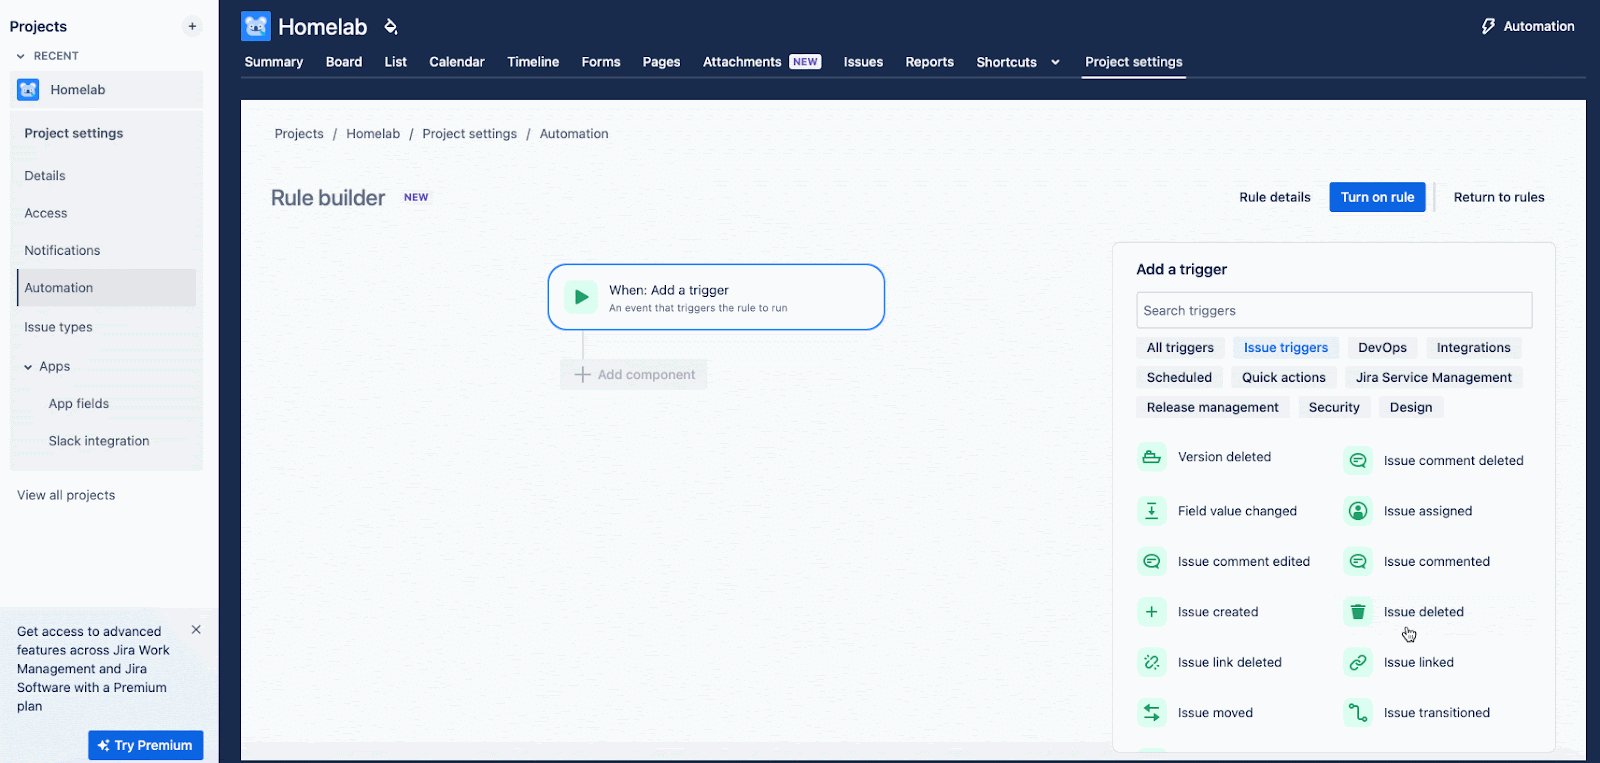
- You will see a Rule Builder panel.
- Choose Issue Transitioned as the trigger, from status IN PROGRESS to status DONE.
- Click Next.
- Choose THEN: Add an action.
- Select Run AWS SSM document.
- Click Connect.
- Enter the ARN of the IAM Role we have created previously. You can find it from the AWS Console.
- Enter the External ID we have configured during IAM role creation. We have chosen jiraautomation as our example.
- Click Save and you can see a configuration panel on the right.
- Select the correct AWS region. We use us-east-1 as an example.
- Select the SSM document we have created previously. We use JiraTestDoc as an example.
- Click Next.
- Click the Turn on rule and give the name of this rule. We use TestJiraRule as an example.
- Click the Turn on rule again.

We have prepared everything necessary. You can also create an issue for testing or use any existing issue in your project board.
Result
We can perform end-to-end testing that triggers the automation rule by transitioning the issue, then check the execution result from the audit log and AWS Console.
- Transit the testing issue from In Progress to Done.
- Go back to the Rule Builder panel and click the Audit log button.
- Check the latest execution if it has a success status.
- Expand the details and click View execution status on AWS Management Console
- Check on AWS Console if the execution outputs a “Hello World!” message.

DevOps Use Cases
As mentioned at the start of this article, Jira is a project management tool widely used in the IT industry as a centralized platform for teams to organize different stages of their work. Therefore, Jira automation plays a critical role in completing fully automated workflows.
For the last part of this article, there is a list of DevOps use cases that you can use to utilize Jira automation, and for sure, there are some useful cases on when we need to integrate AWS SSM to cover its weaknesses.
Typical use cases with Jira Automation
- Create a branch on GitHub repositories when an issue has been created.
- Notify the QA team members on Slack when an issue has been transitioned to QA status.
- Comment on an issue when it has passed each stage.
- Assign the issue to the specific team when it has reached a specific stage.
More use cases with AWS SSM,
- Authenticate to GitHub Rest API using Lambda Function and trigger a GitHub Actions workflow when an issue has transitioned.
- Create an AWS Elastic Beanstalk environment while deploying a bugfix branch linked to an issue.
- Trigger AWS CodeBuild for CI when there is a new commit against the feature branch linked to a feature ticket.
The above use cases are popular and useful in reducing daily manual tasks. Automating those tasks is also the responsibility of a DevOps Engineer. By using Jira automation with AWS SSM, you can create tons of possibilities that help your job.